Appearance
Setup Microsoft Authenticator
This guide walks you through registering the Microsoft Authenticator app on your phone as a sign-in method, using the guided setup in BusinessID.
Before you start, make sure the Microsoft Authenticator app is installed on your phone. If you don't have the app, download it from the Apple App Store or Google Play.
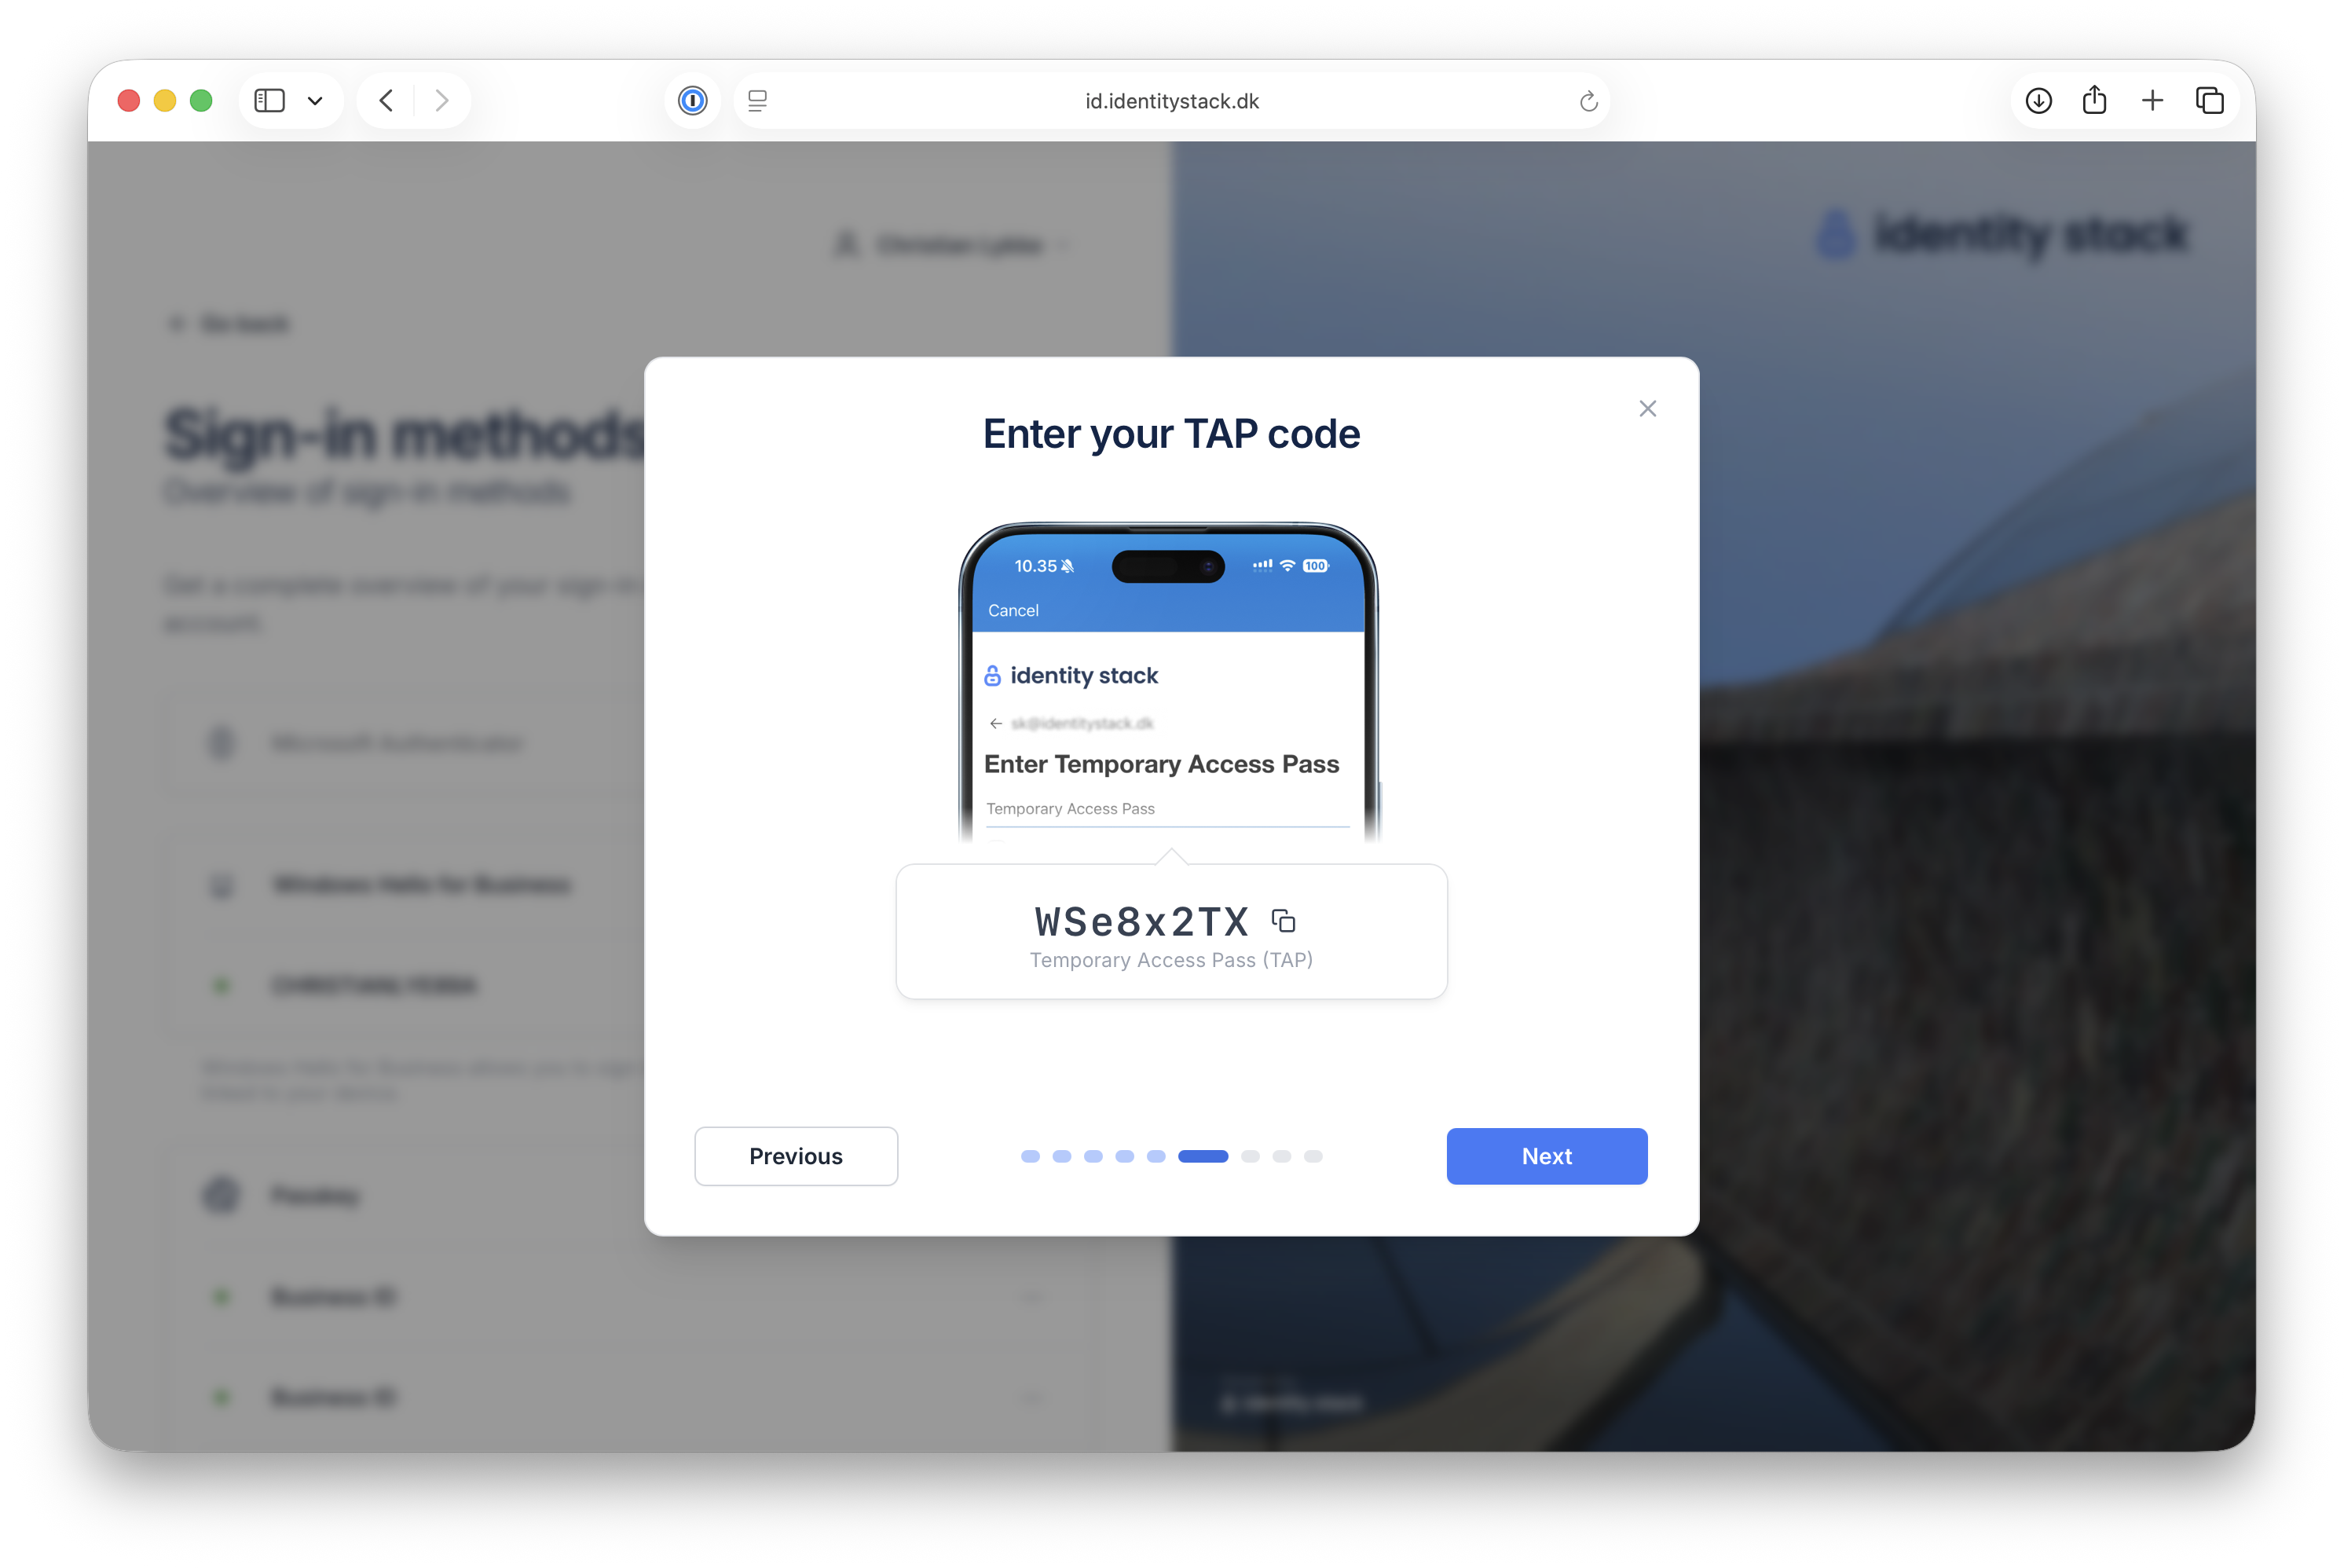
During the setup, BusinessID shows your username and a Temporary Access Pass (TAP) — a one-time code generated for the setup. You enter both in the Microsoft Authenticator app on your phone.
1. Start the setup
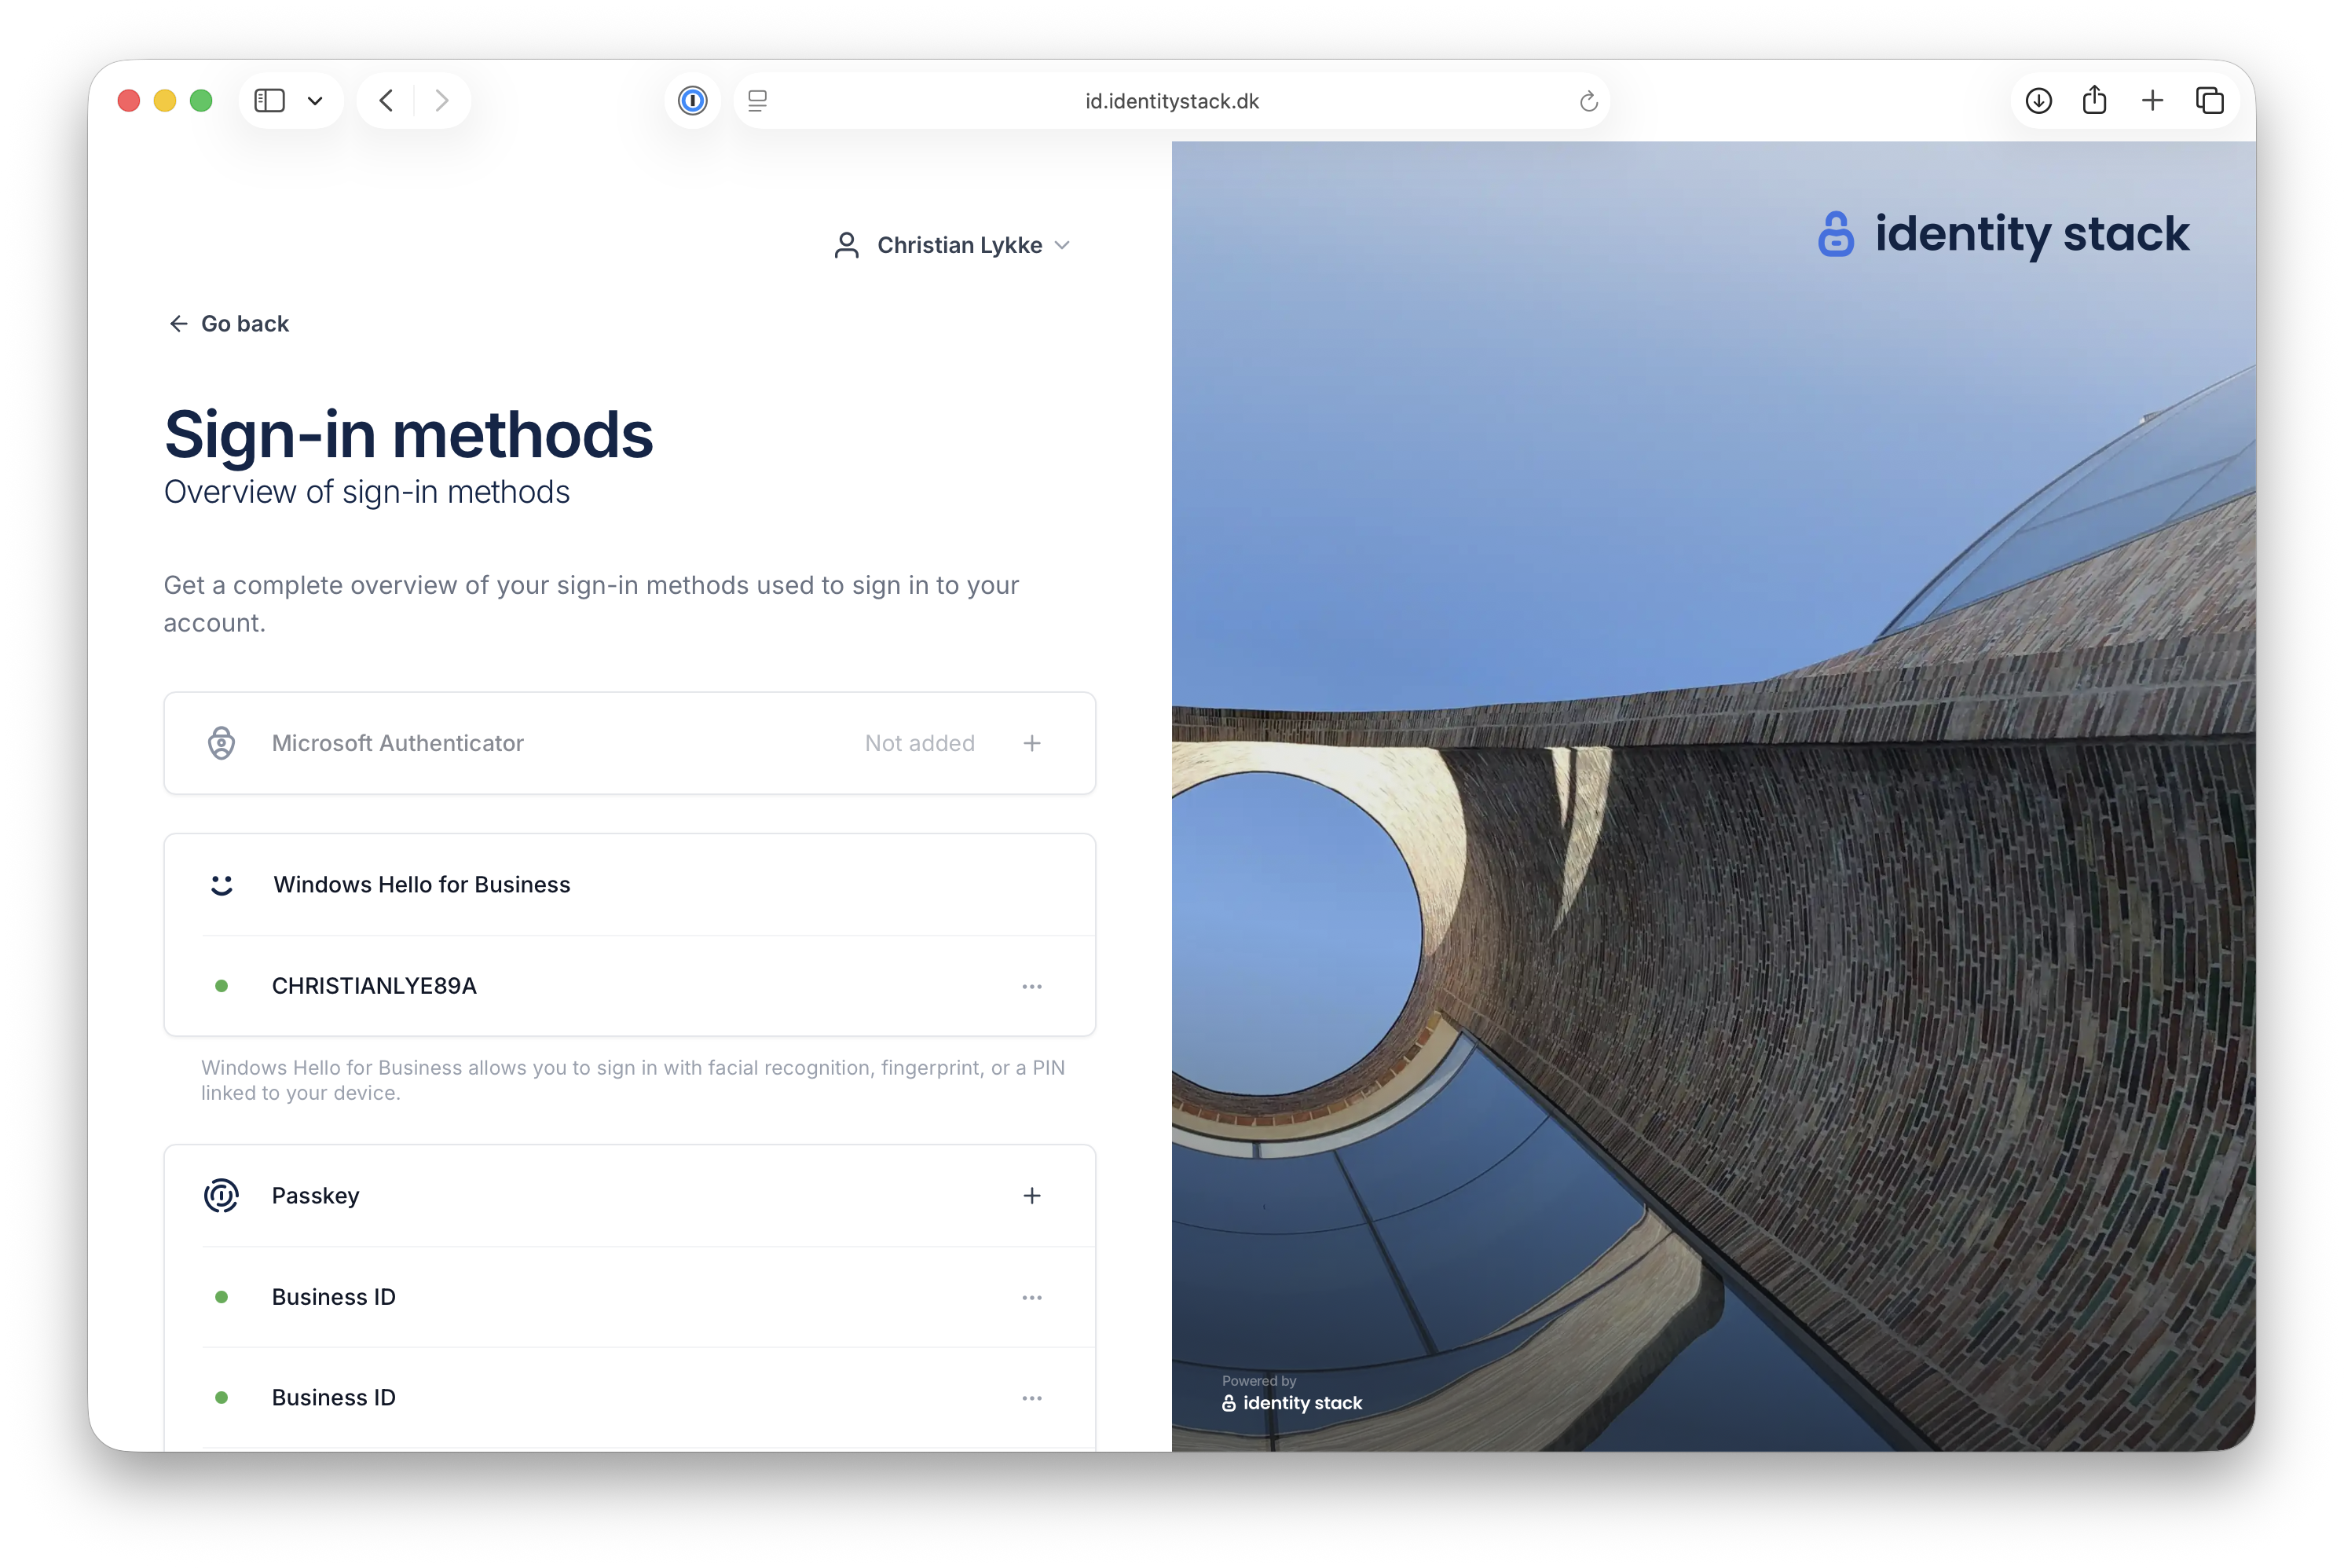
Log in to BusinessID and go to Sign-in methods. Microsoft Authenticator is shown as Not added — click + to start the setup.
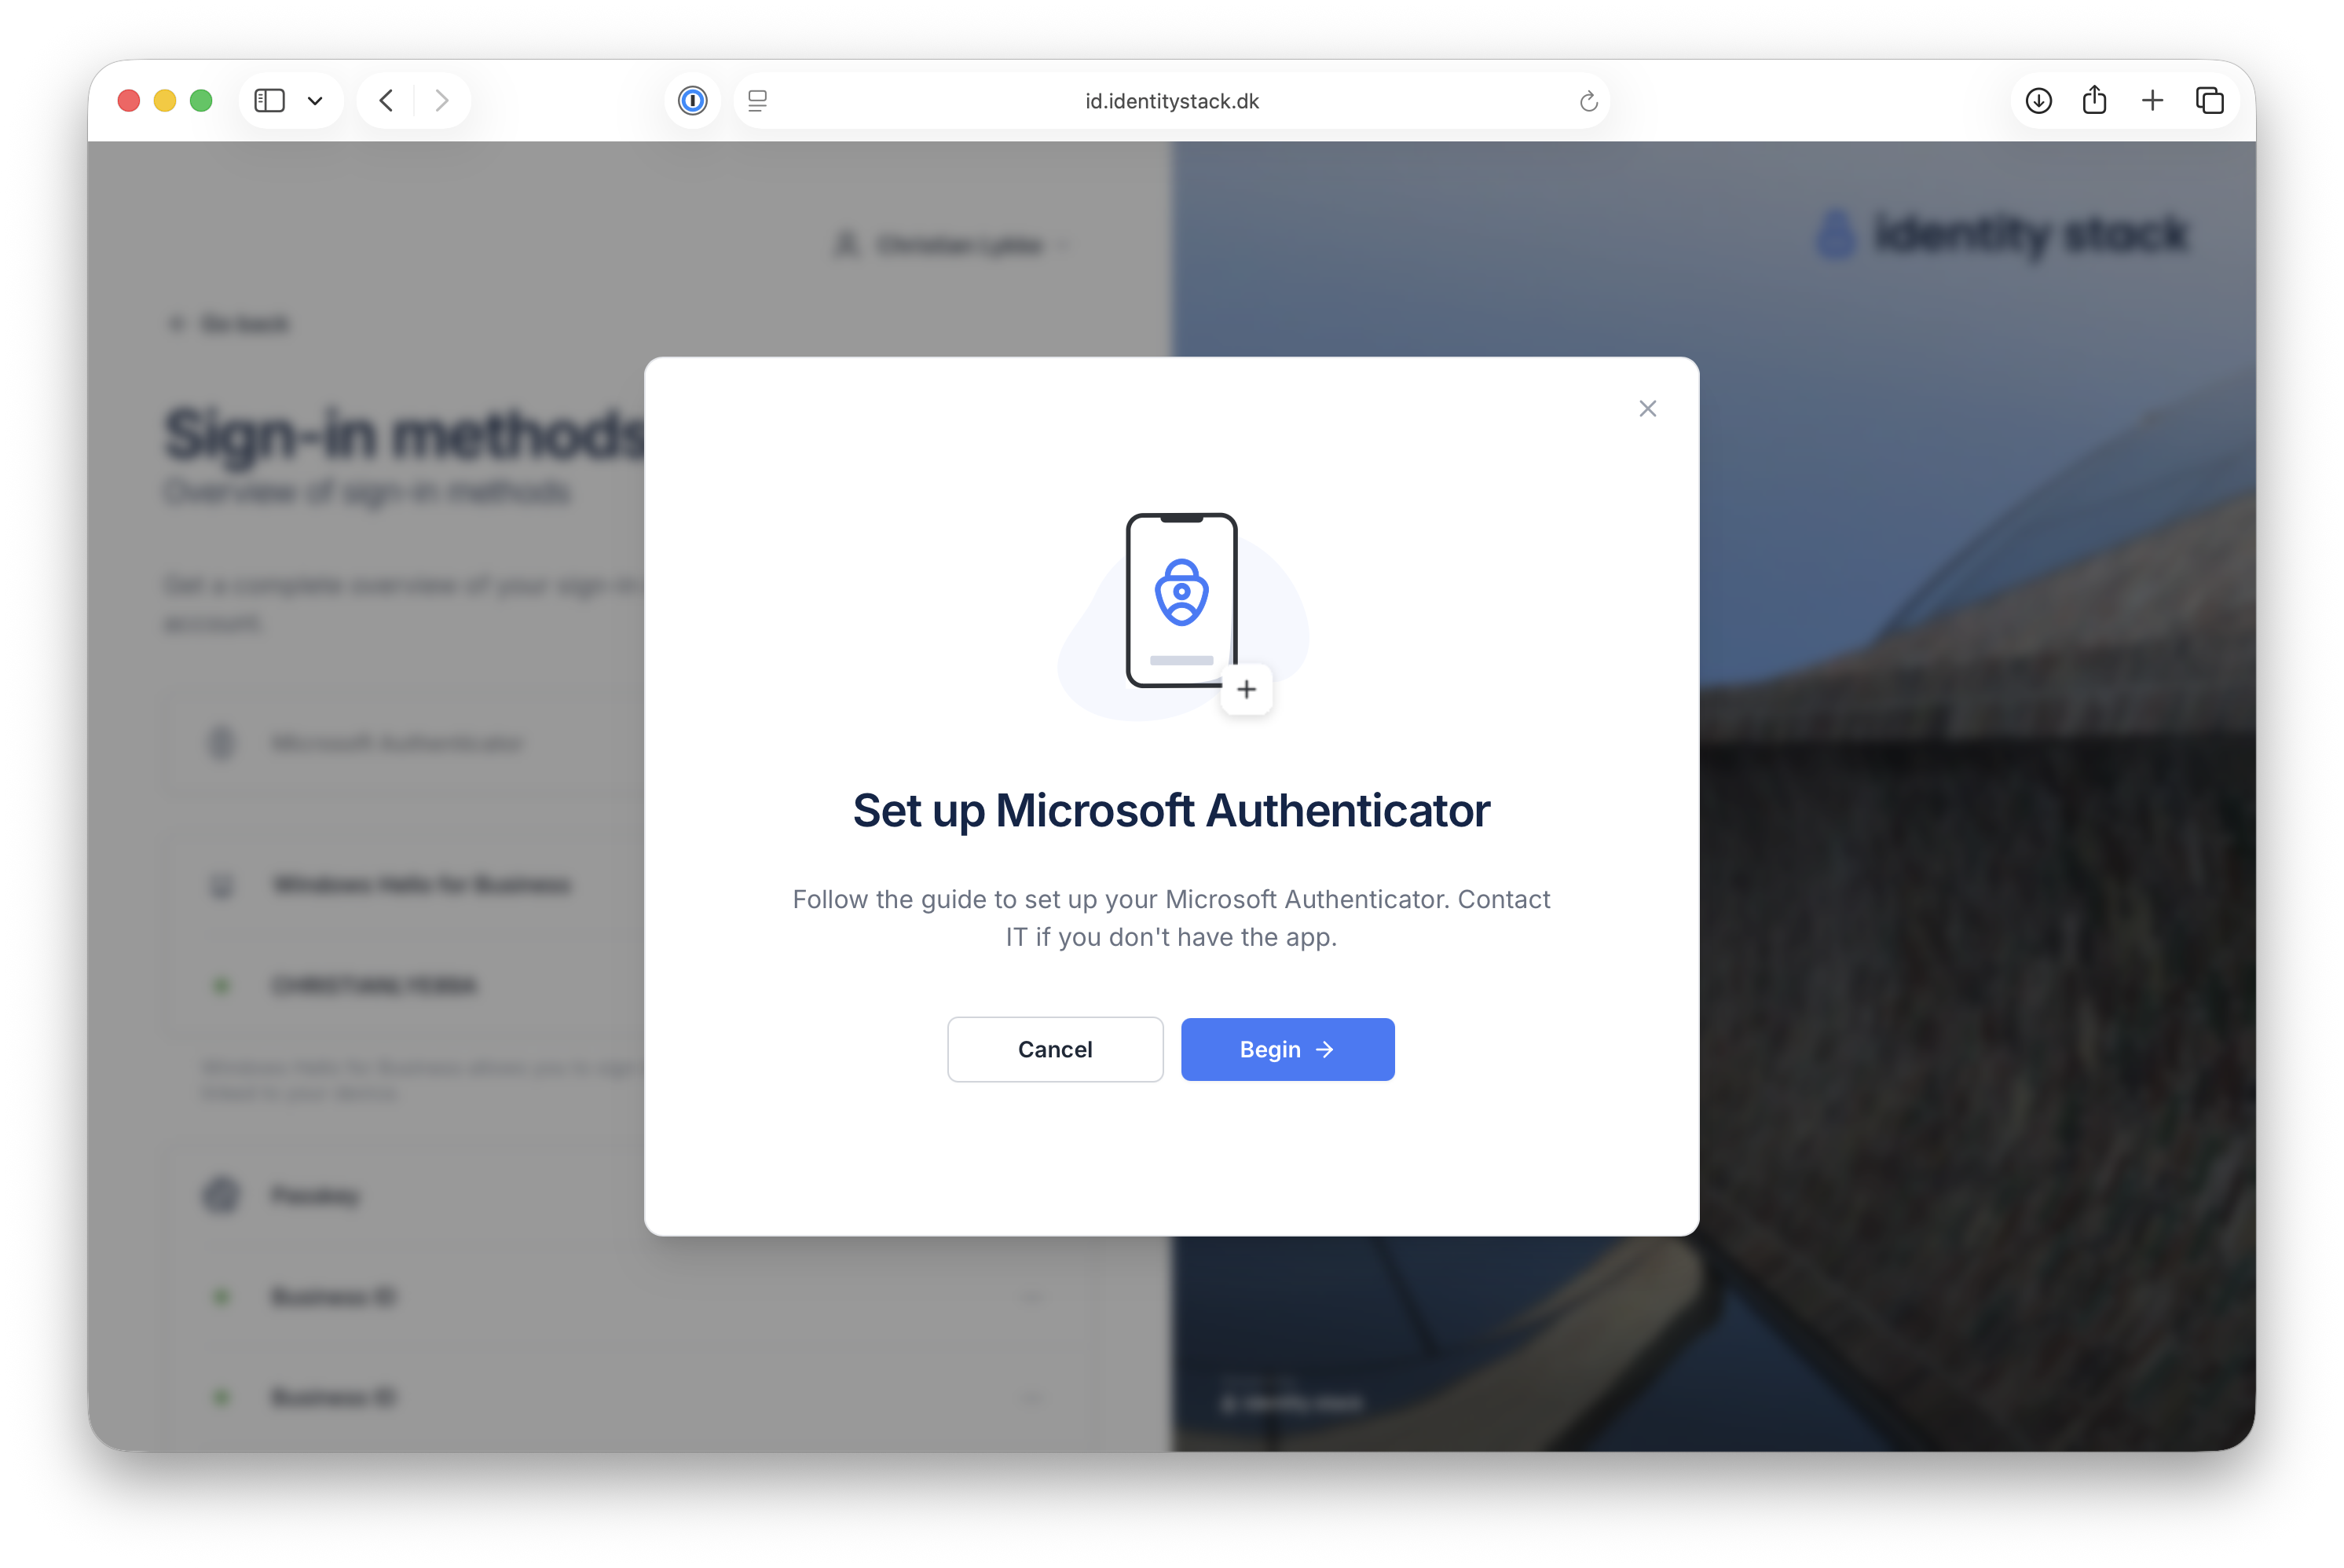
Click Begin to start the guided setup.
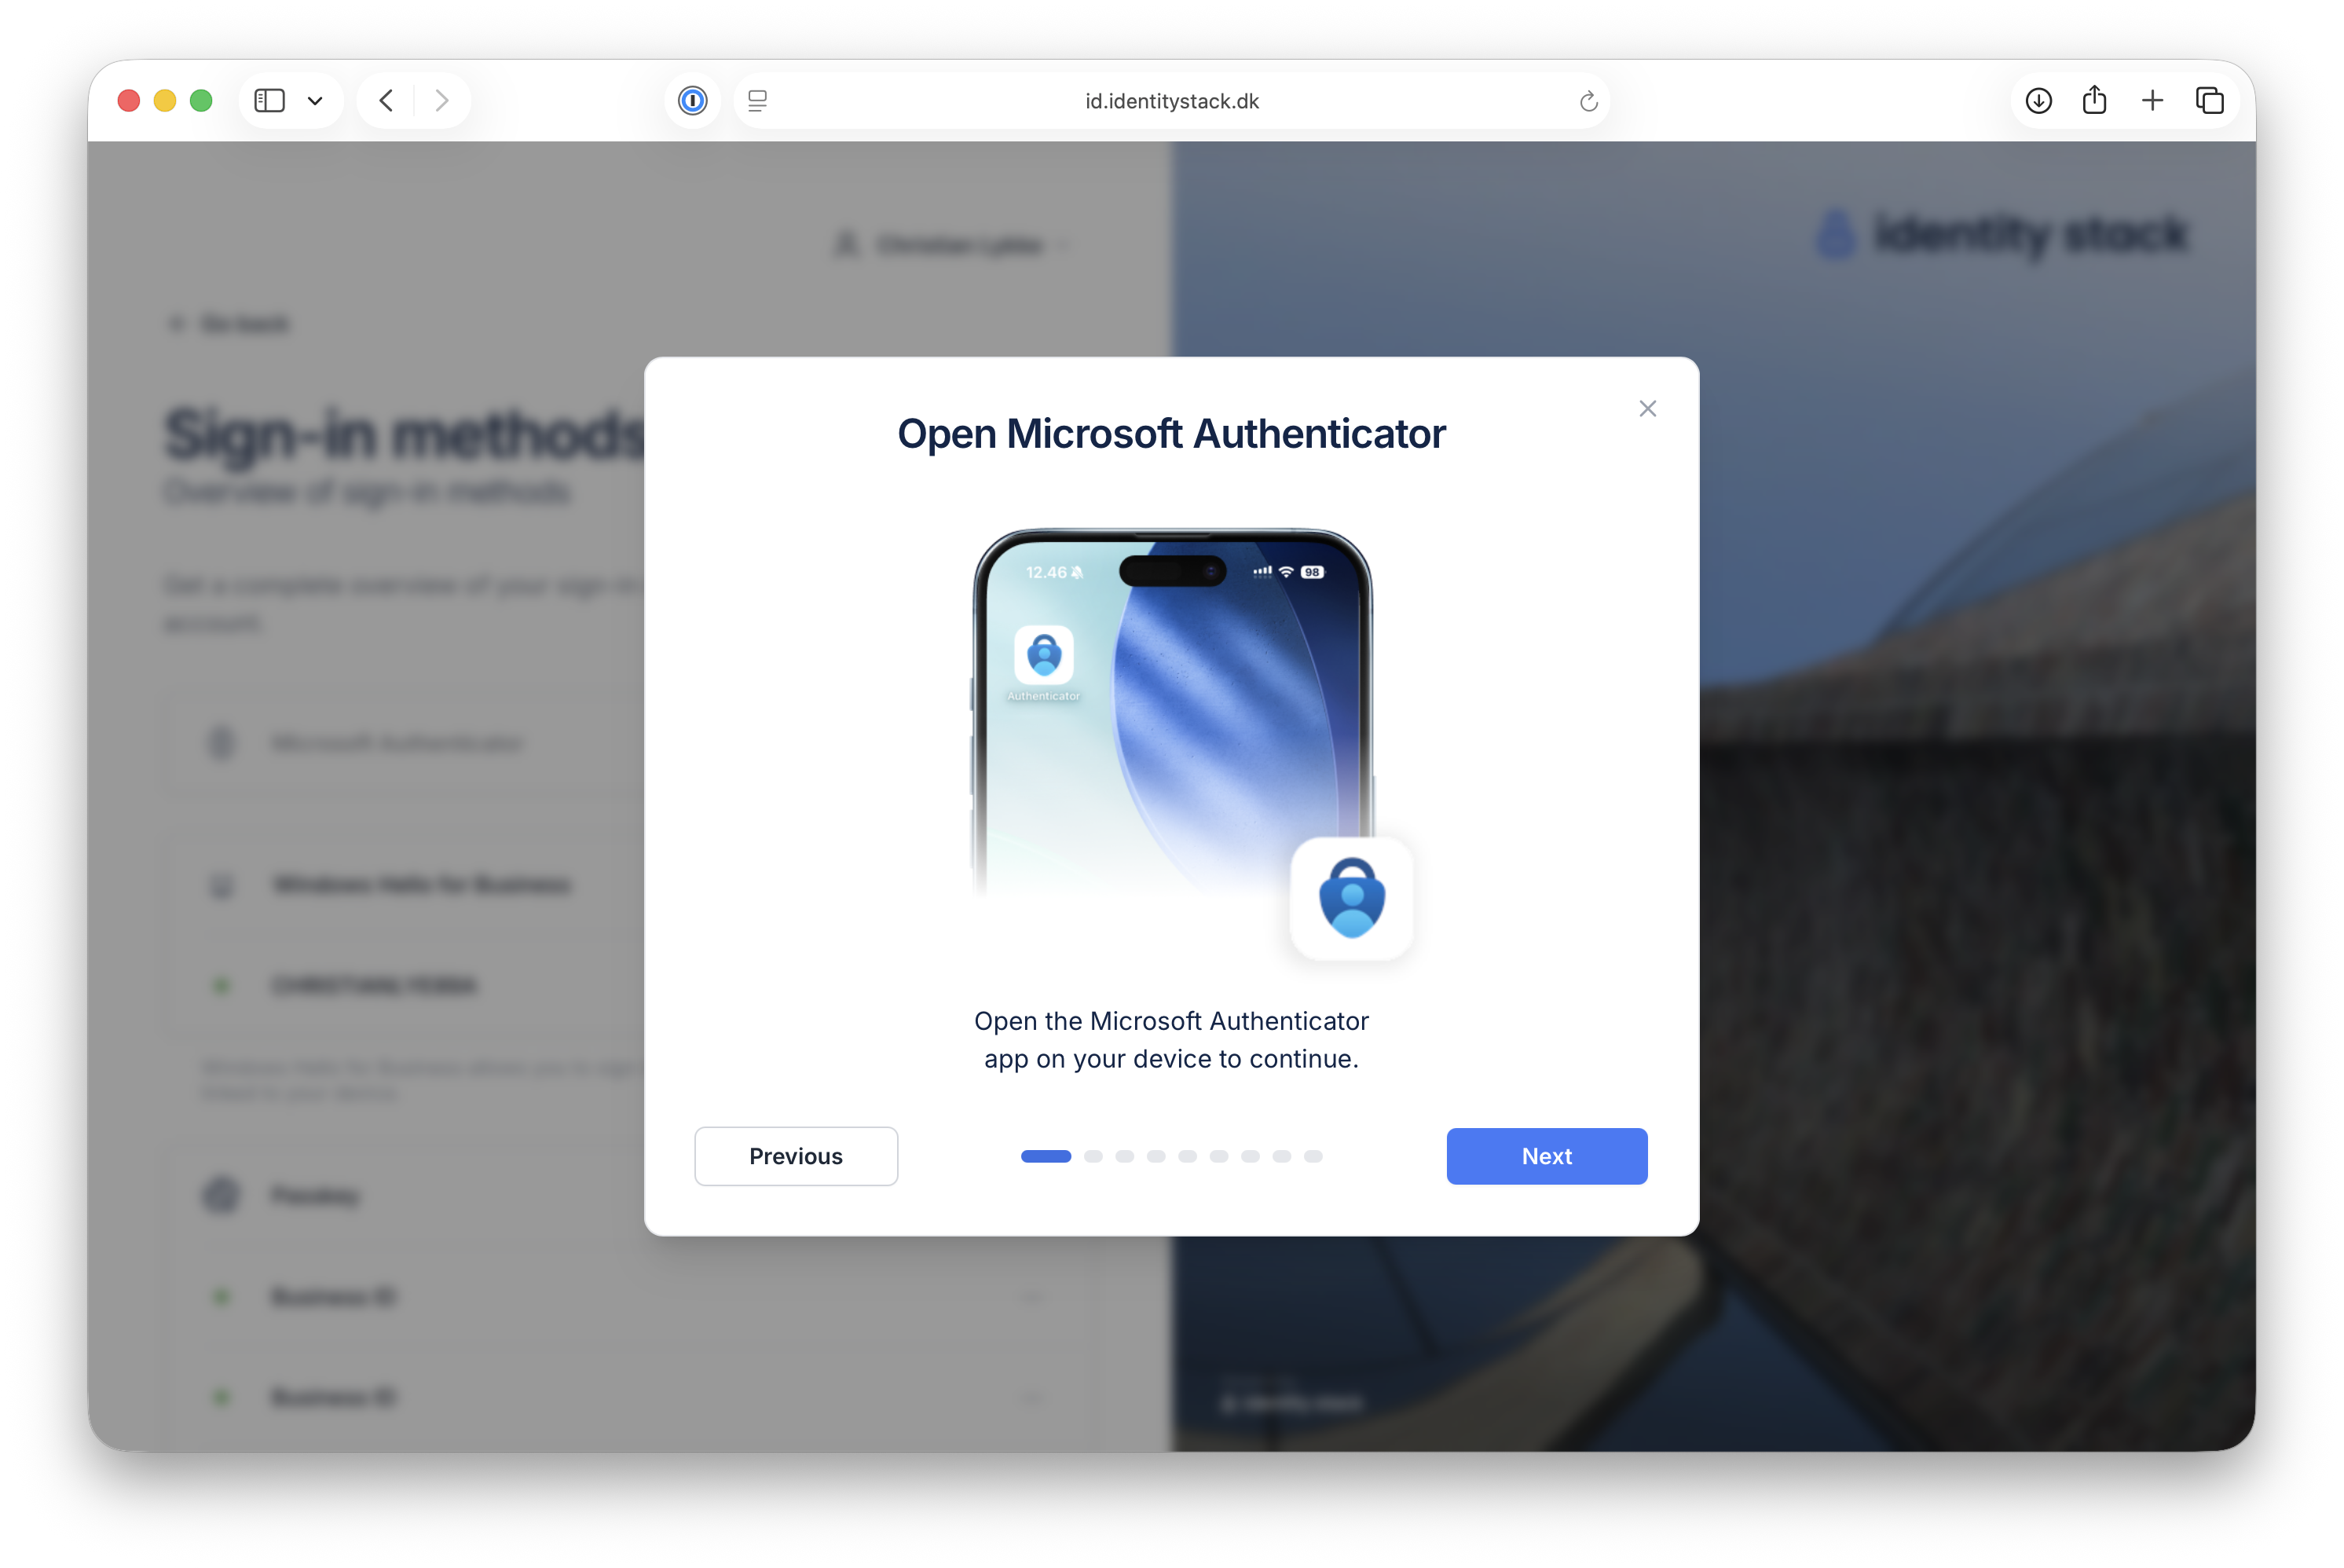
2. Open Microsoft Authenticator
Open the Microsoft Authenticator app on your phone and click Next.
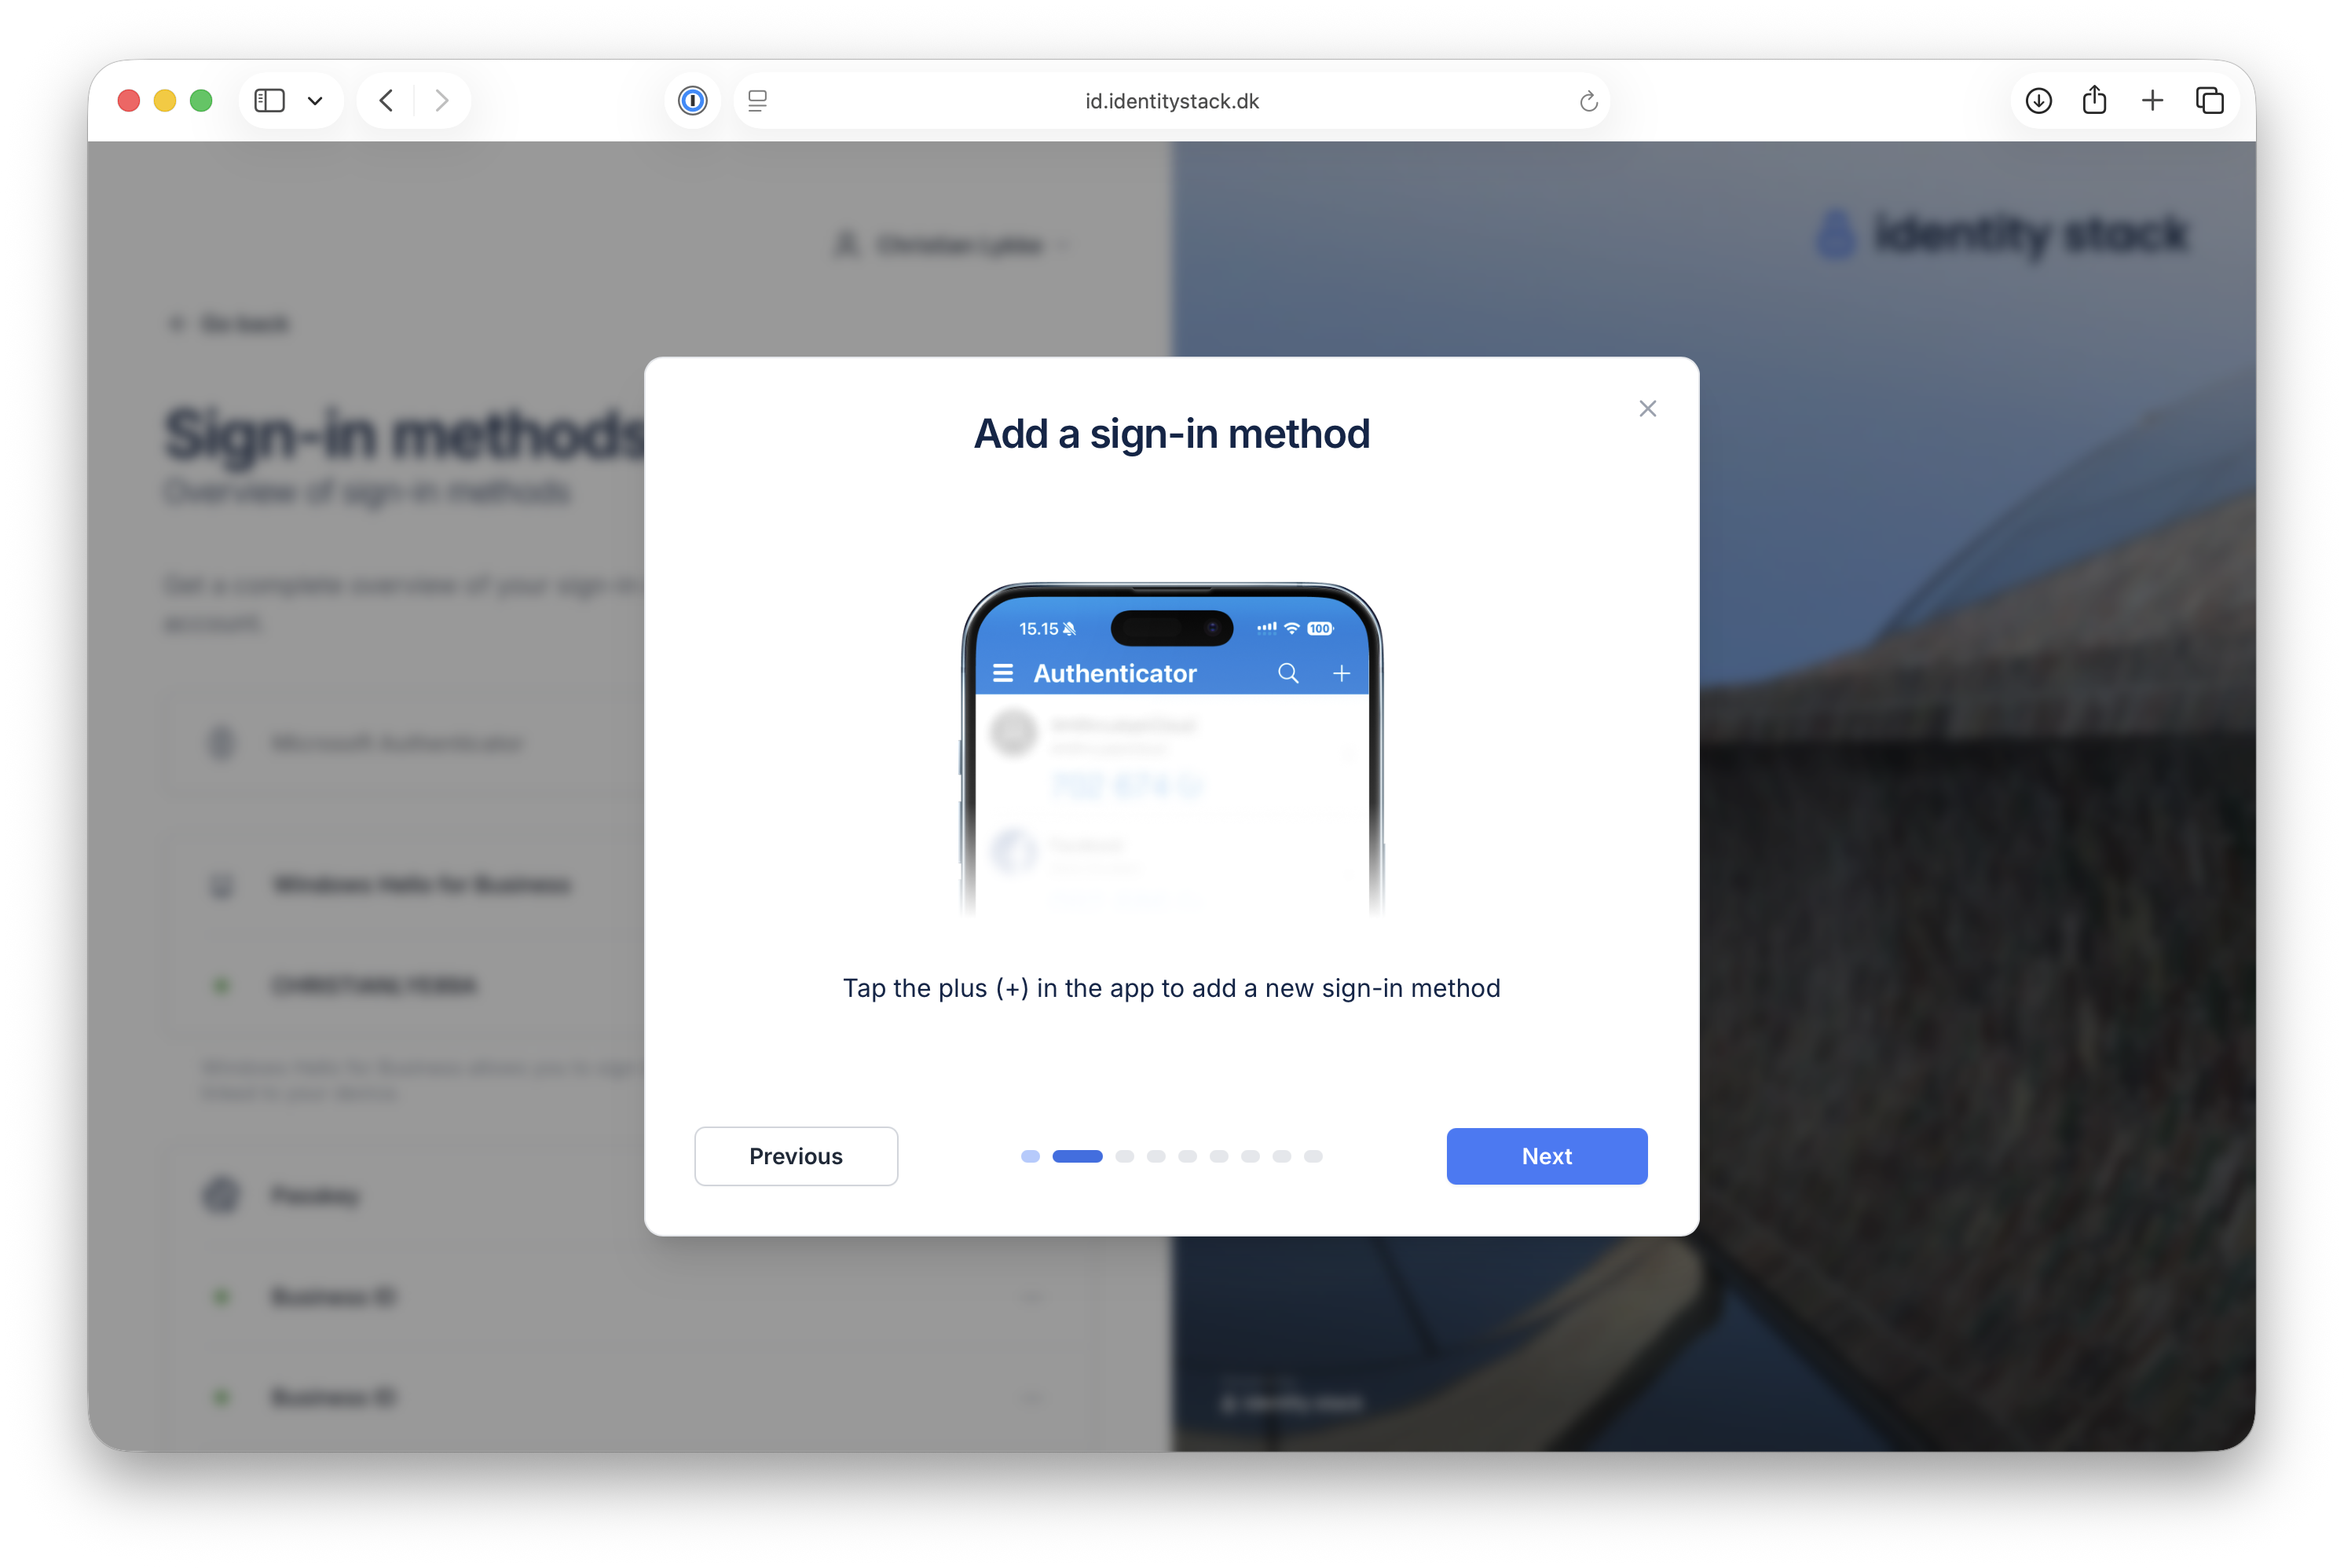
3. Add a sign-in method
Tap the plus (+) in the app to add a new sign-in method and click Next.
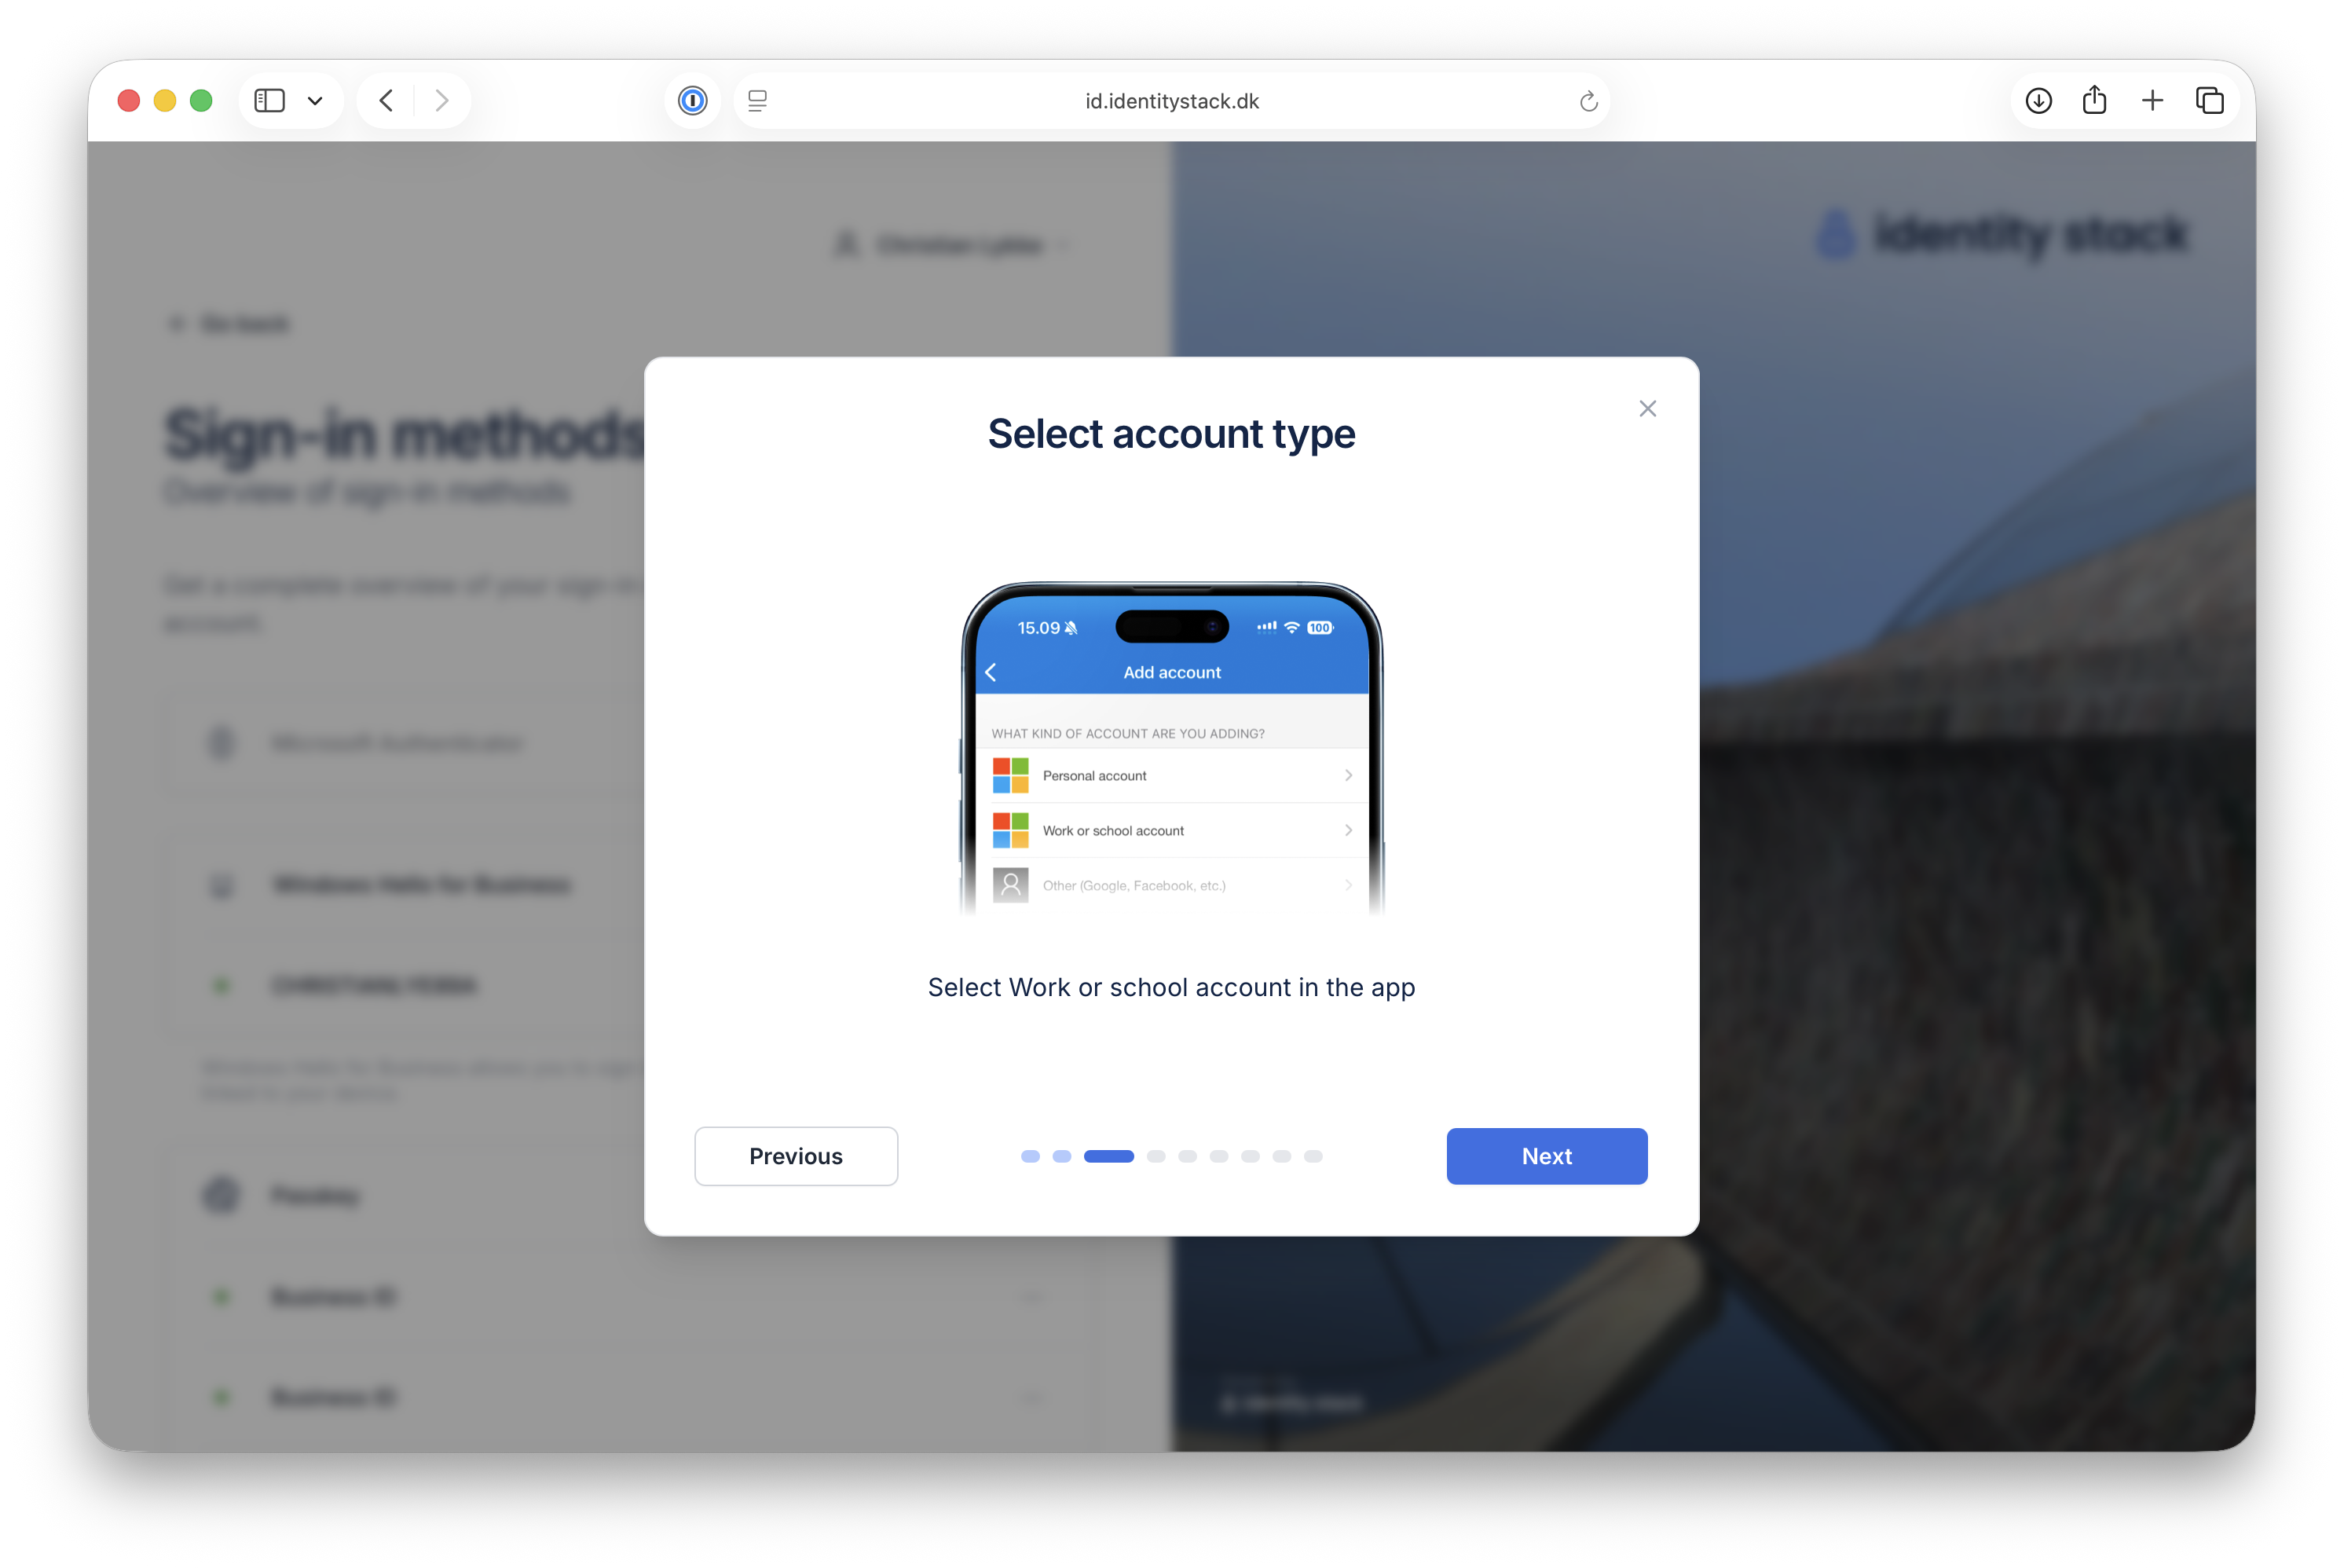
4. Select account type
Select Work or school account in the app and click Next.
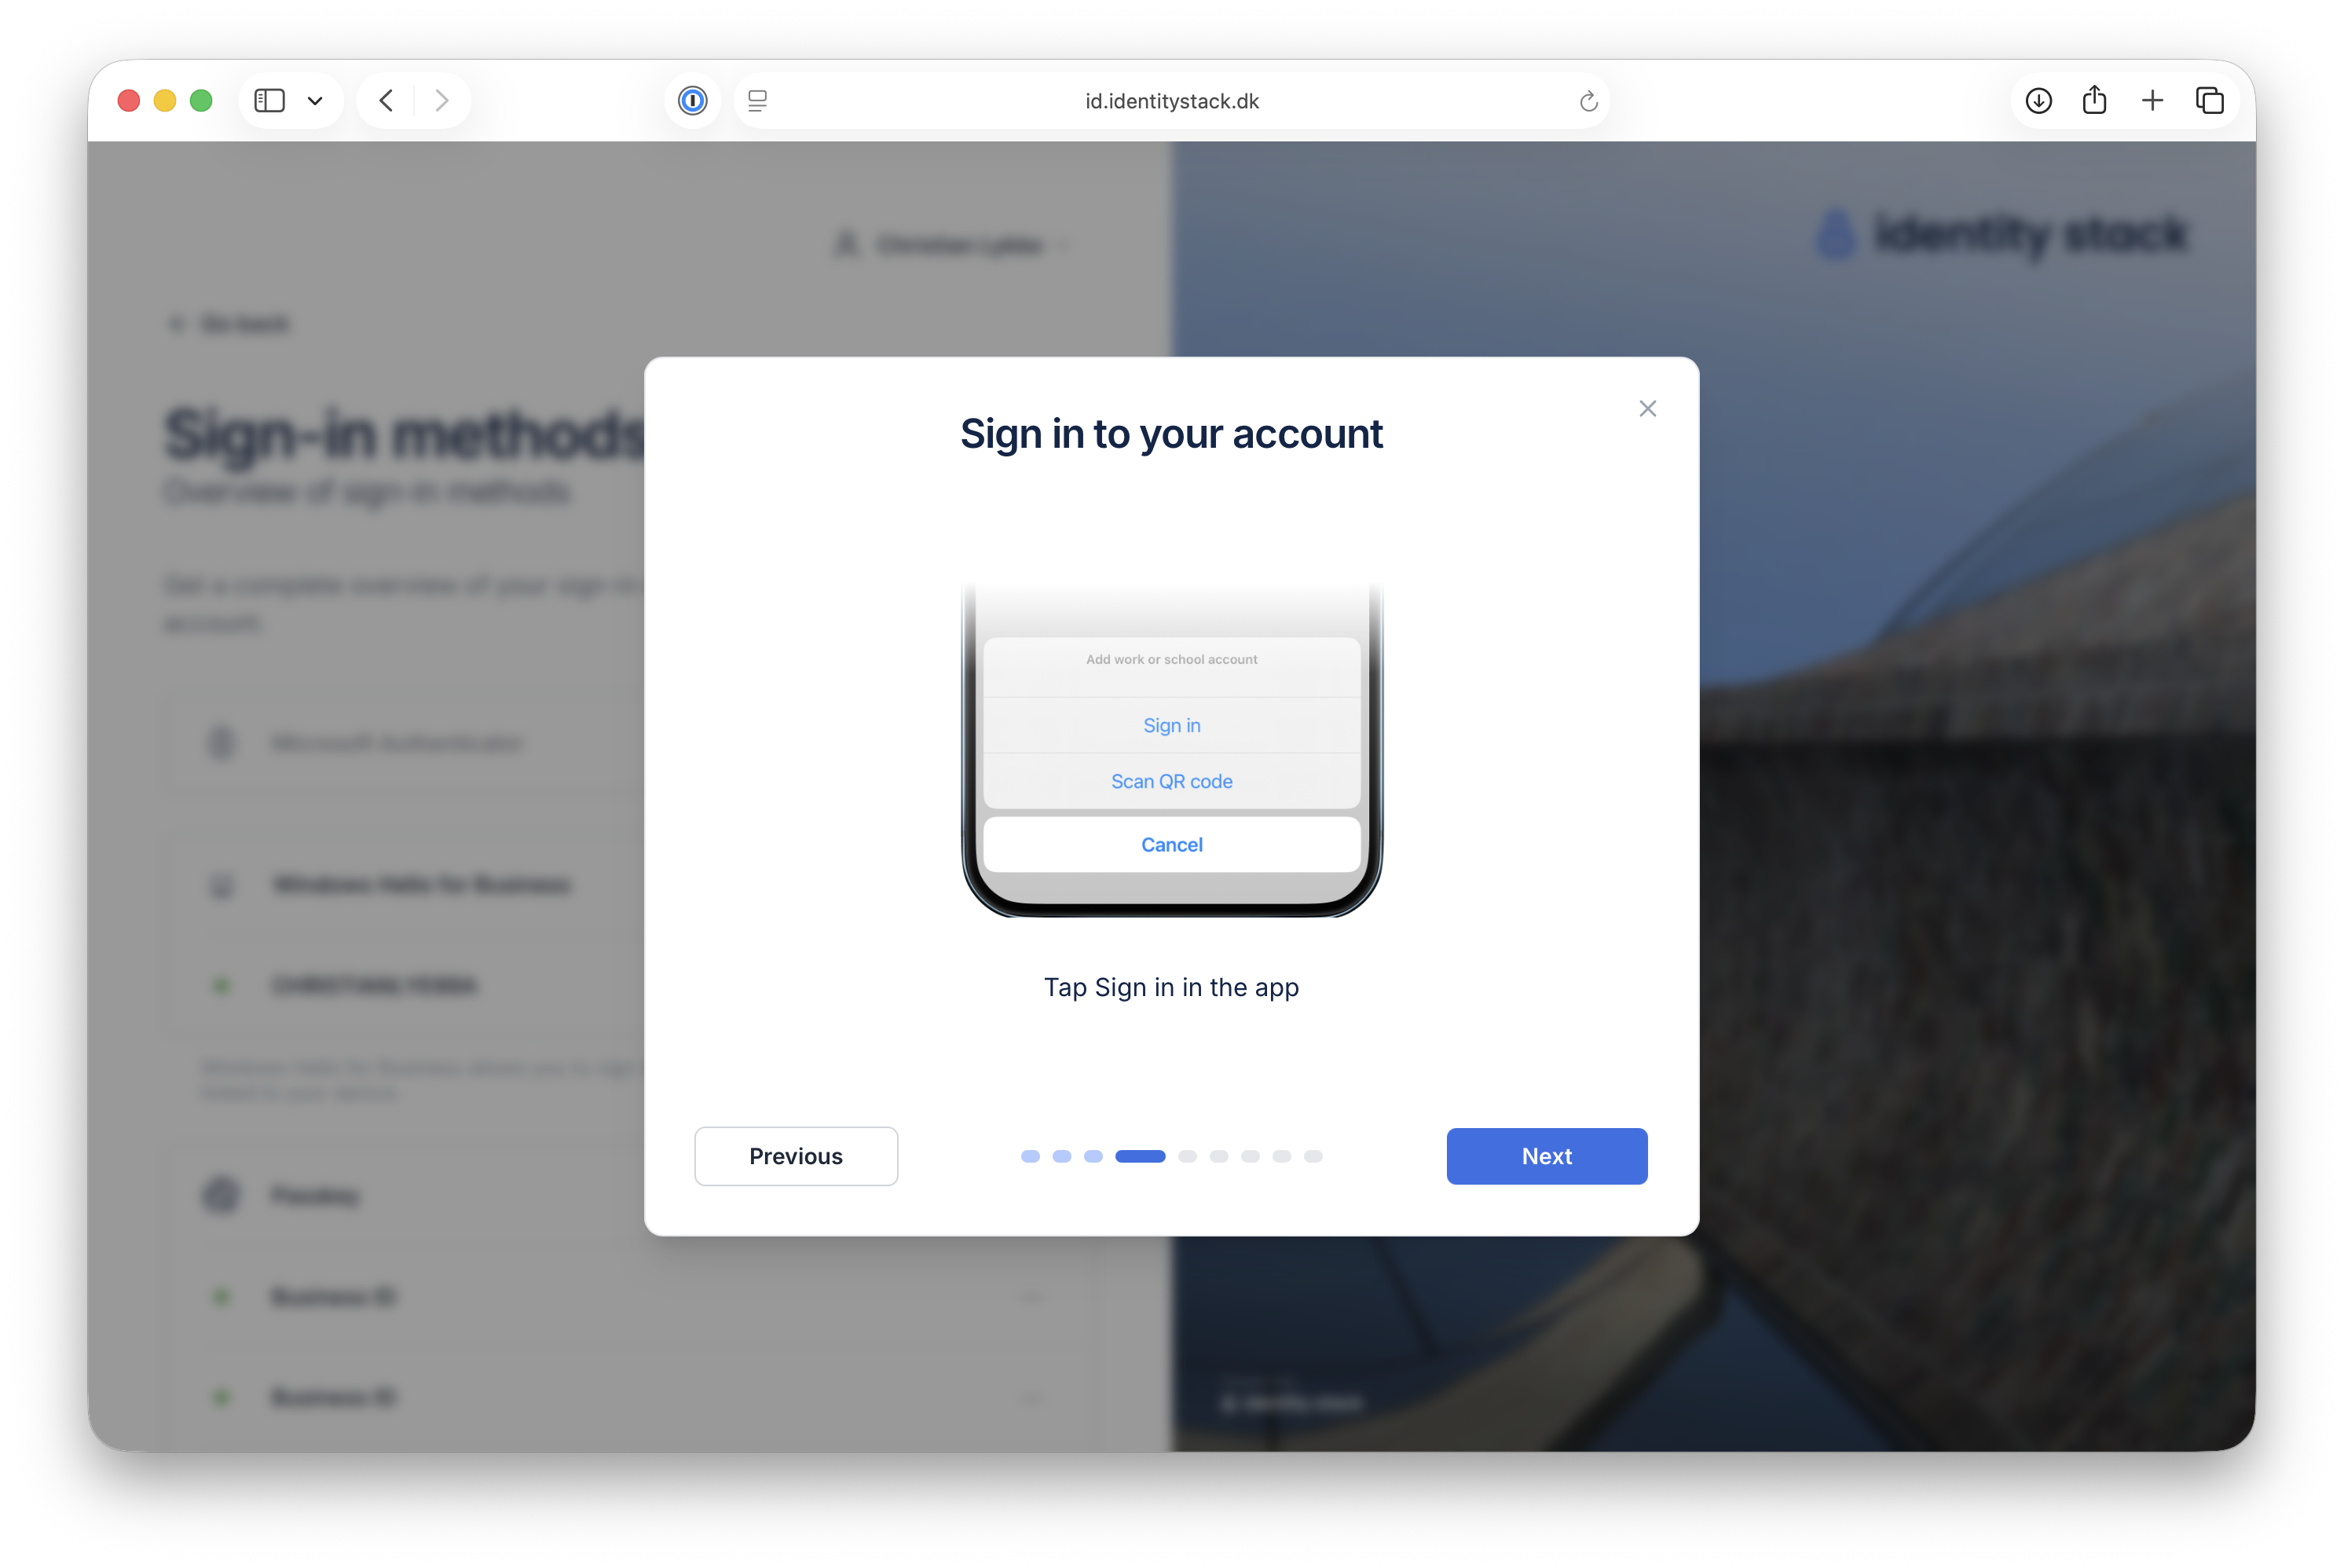
5. Sign in to your account
Tap Sign in in the app and click Next.
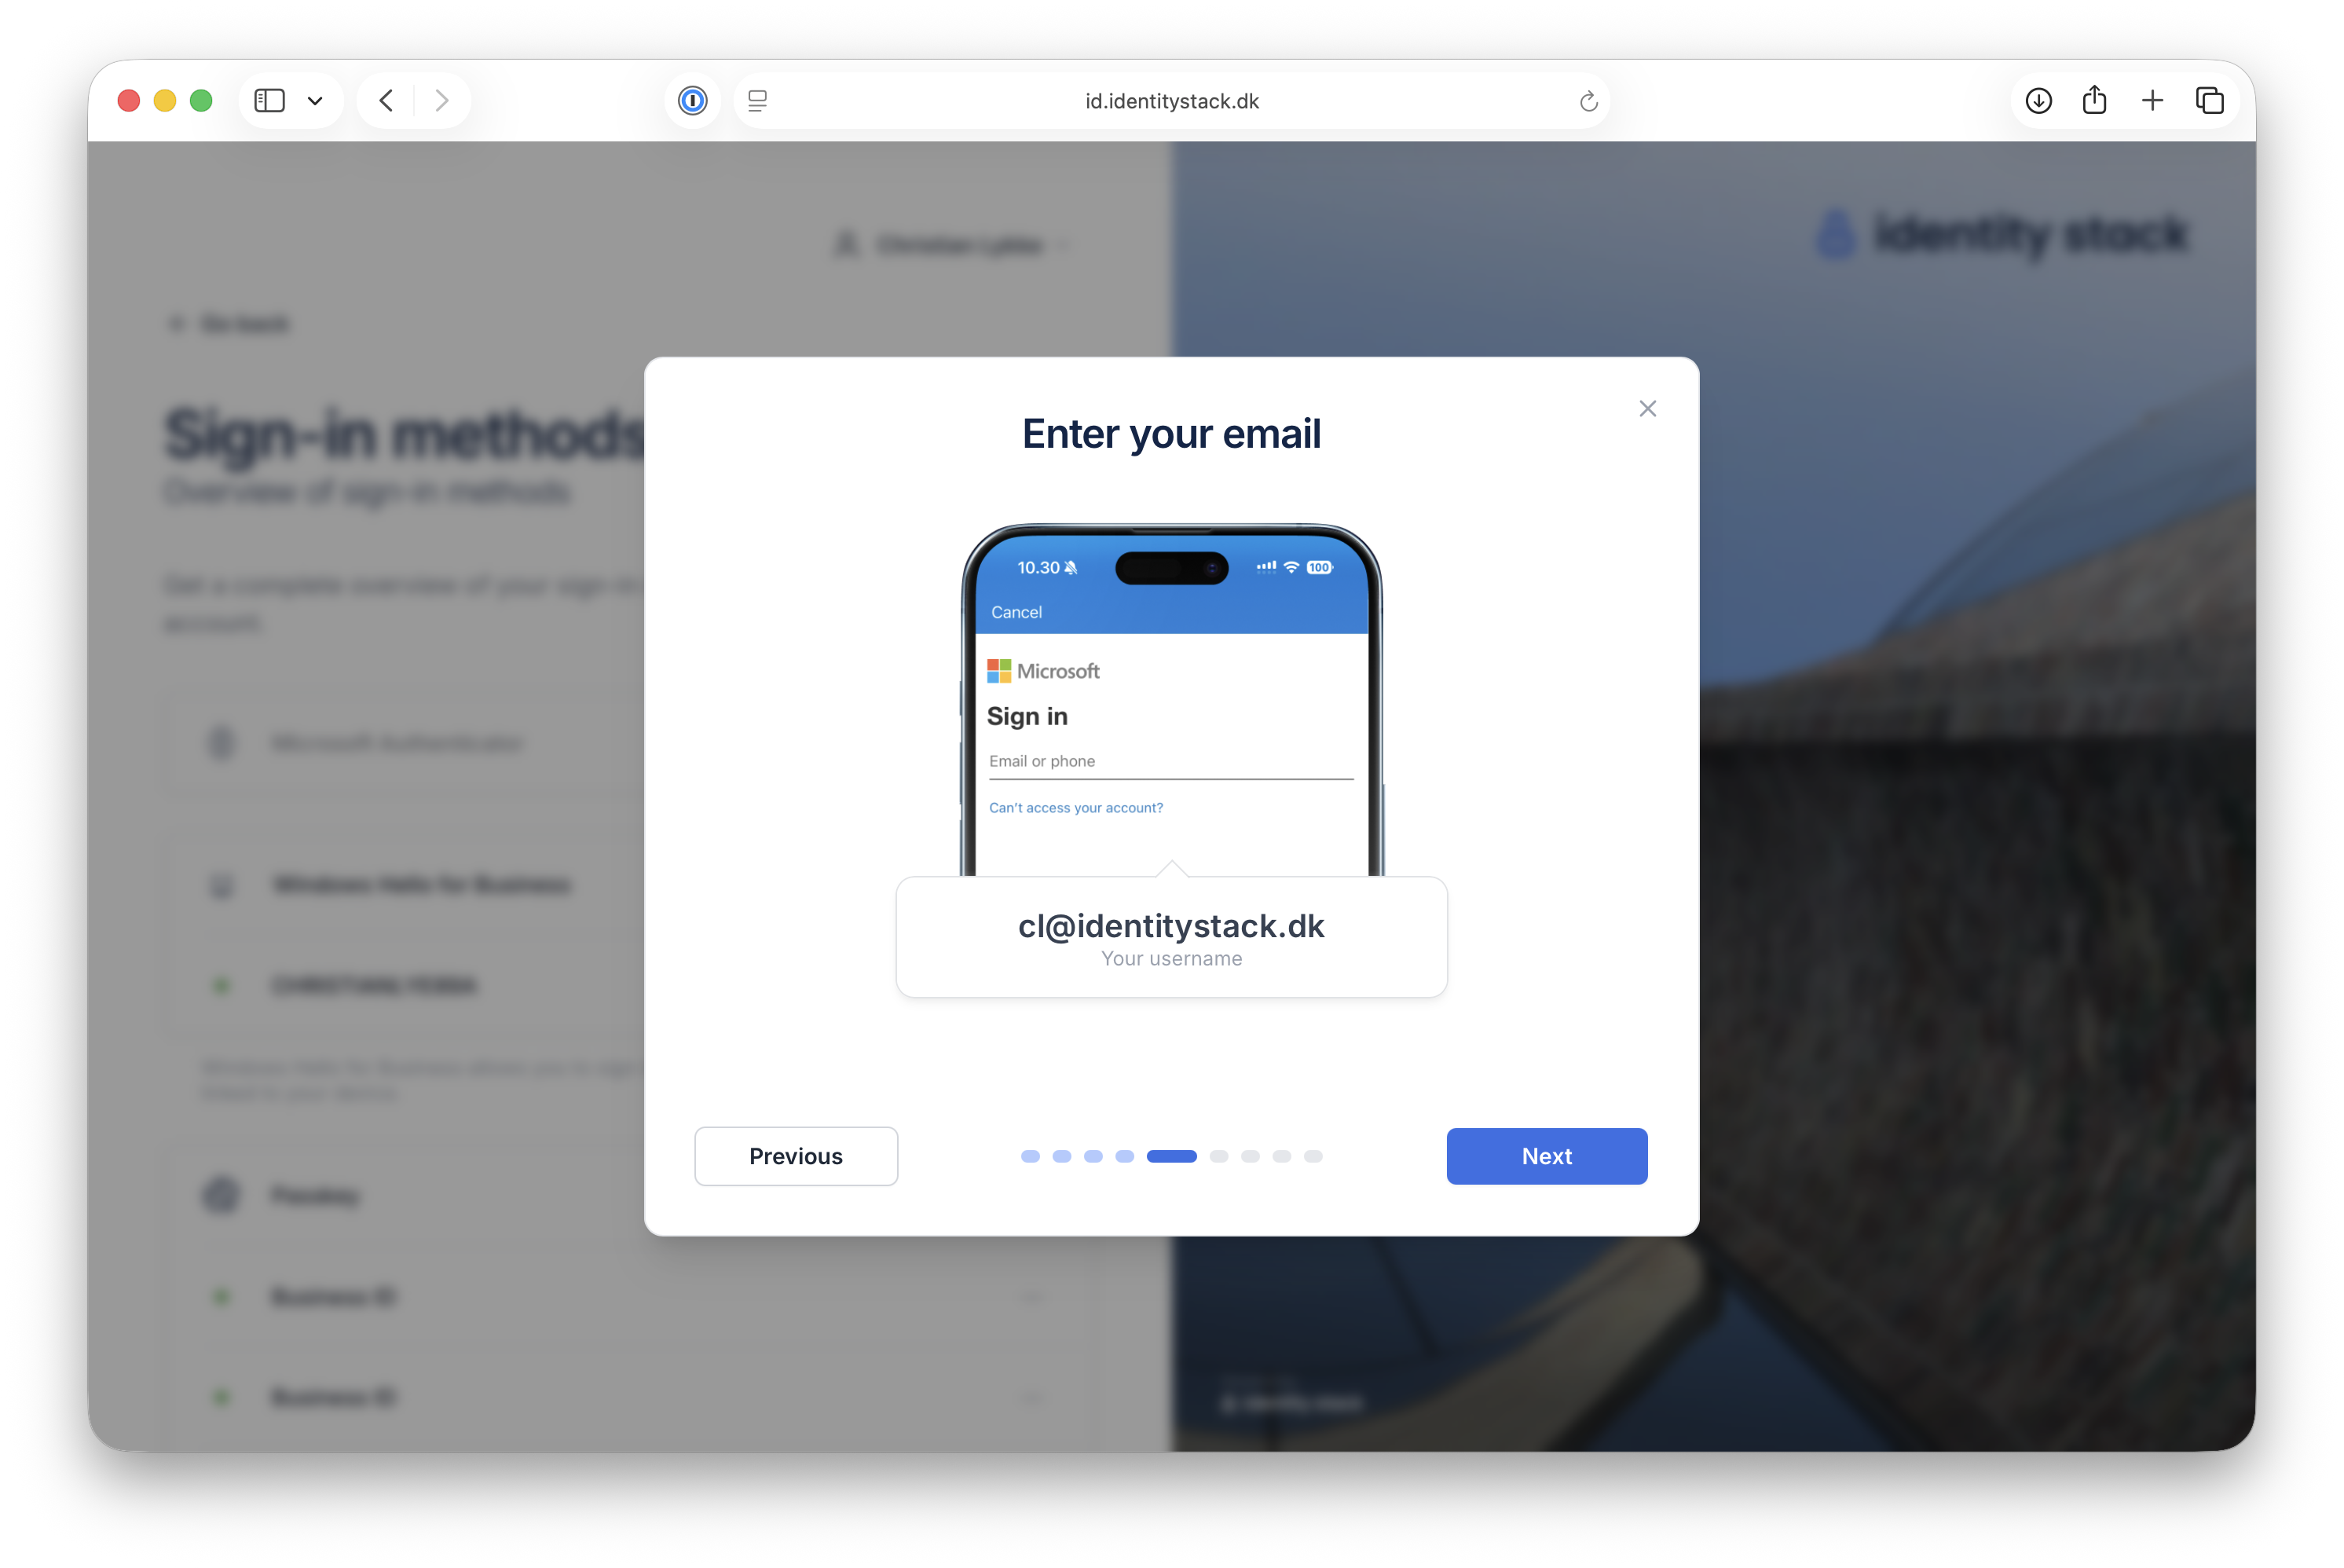
6. Enter your email
The app asks you to sign in with Microsoft. Enter the username shown in the dialog — in this example cl@identitystack.dk — and click Next.
7. Enter your TAP code
The app asks for a Temporary Access Pass (TAP). Enter the TAP code shown in the dialog. Click Next.
8. Complete the setup on your phone
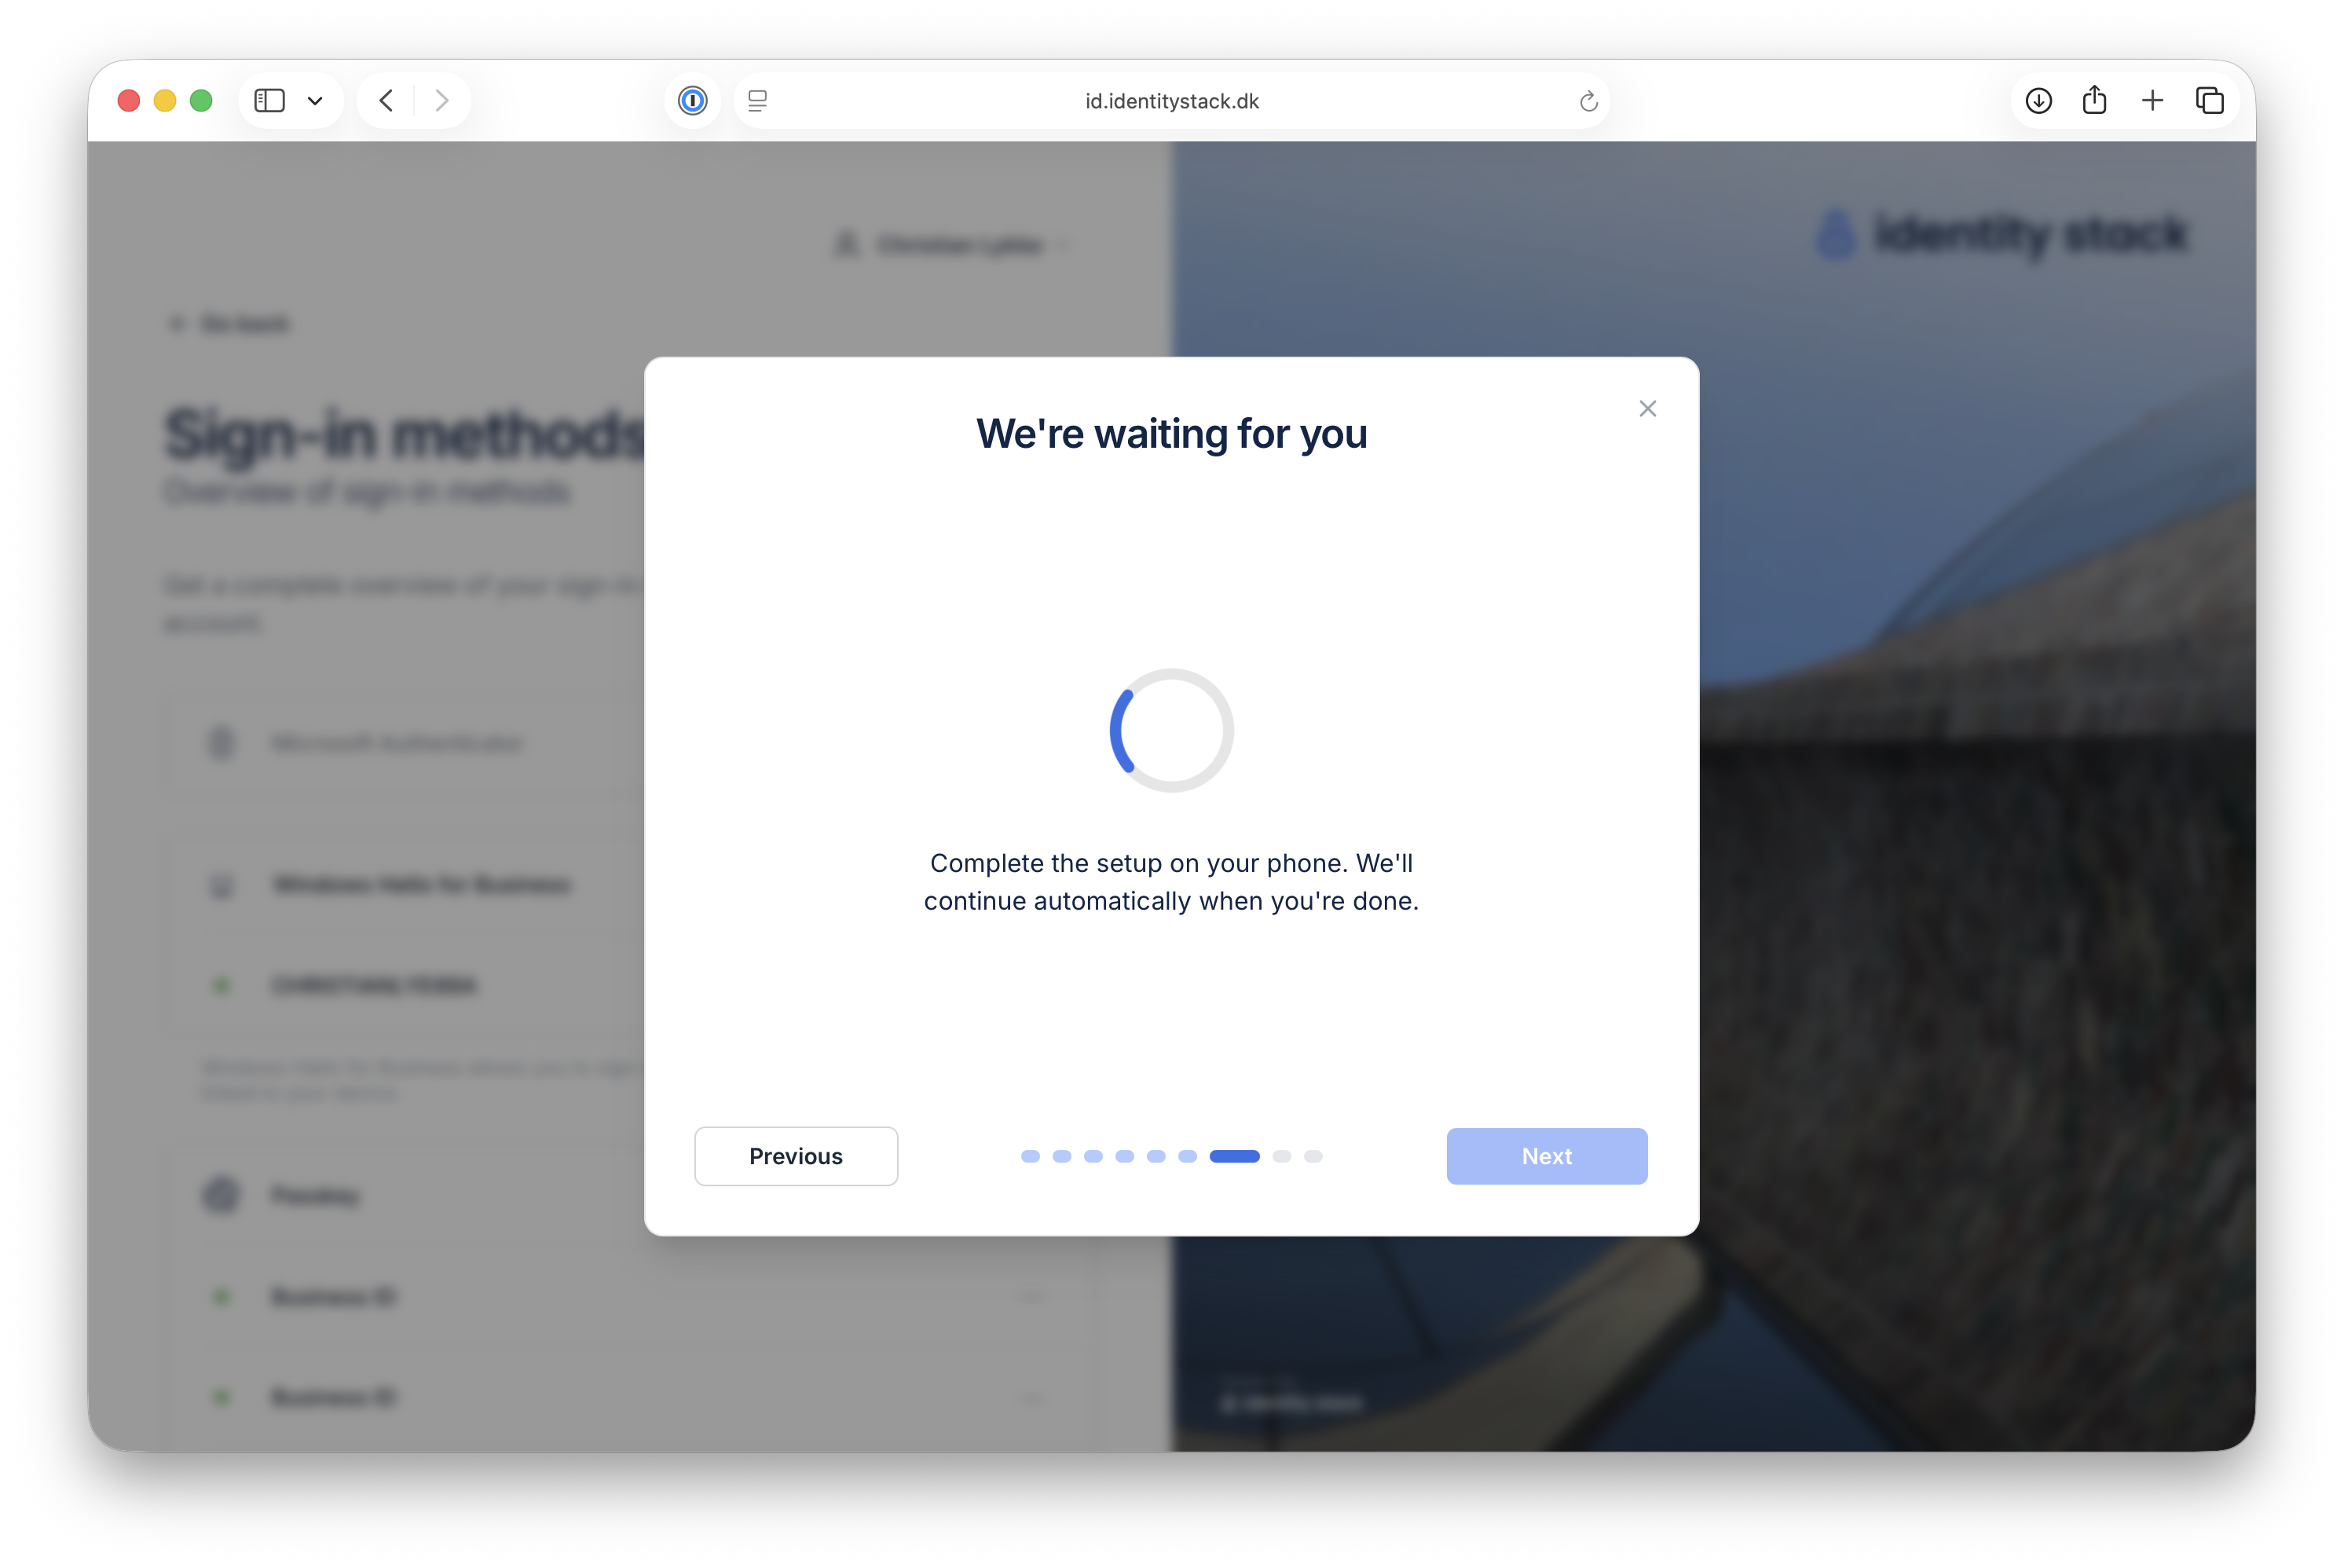
Finish the remaining steps in the app on your phone. BusinessID waits and continues automatically when you're done.
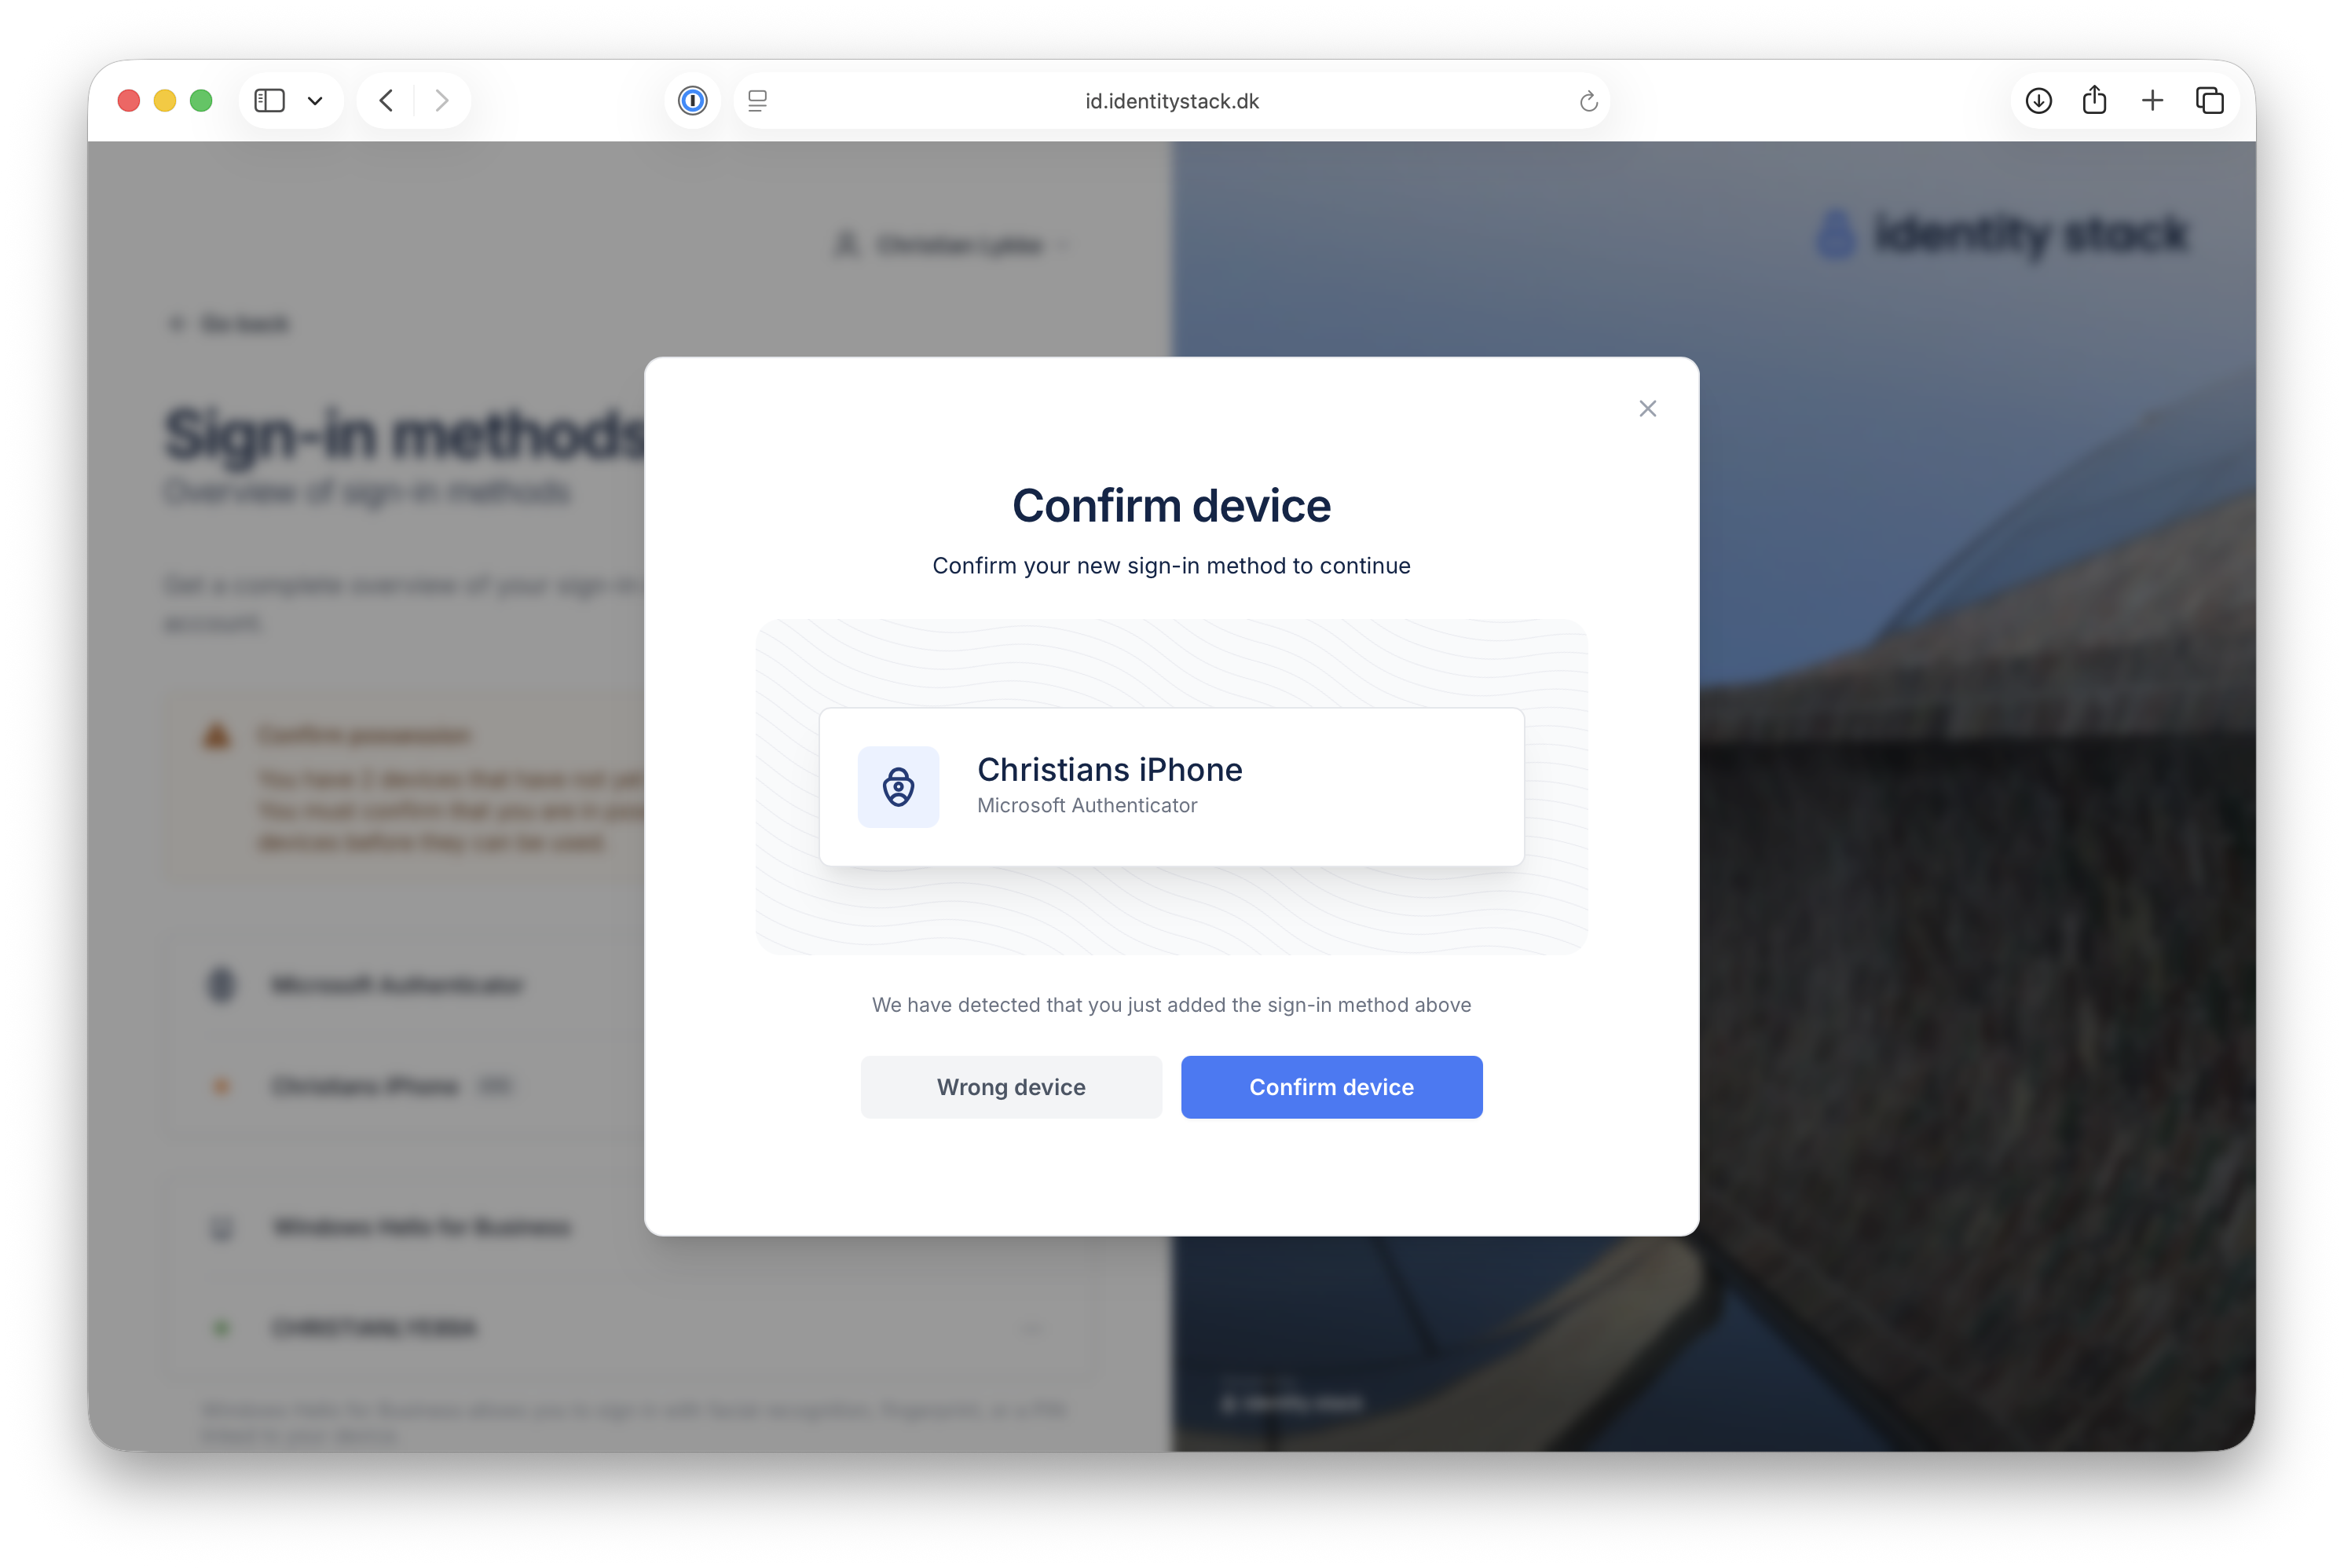
9. Confirm your device
To confirm that you are in possession of the new device, verify that the device shown is yours and click Confirm device. If you don't recognize the device, click Wrong device.
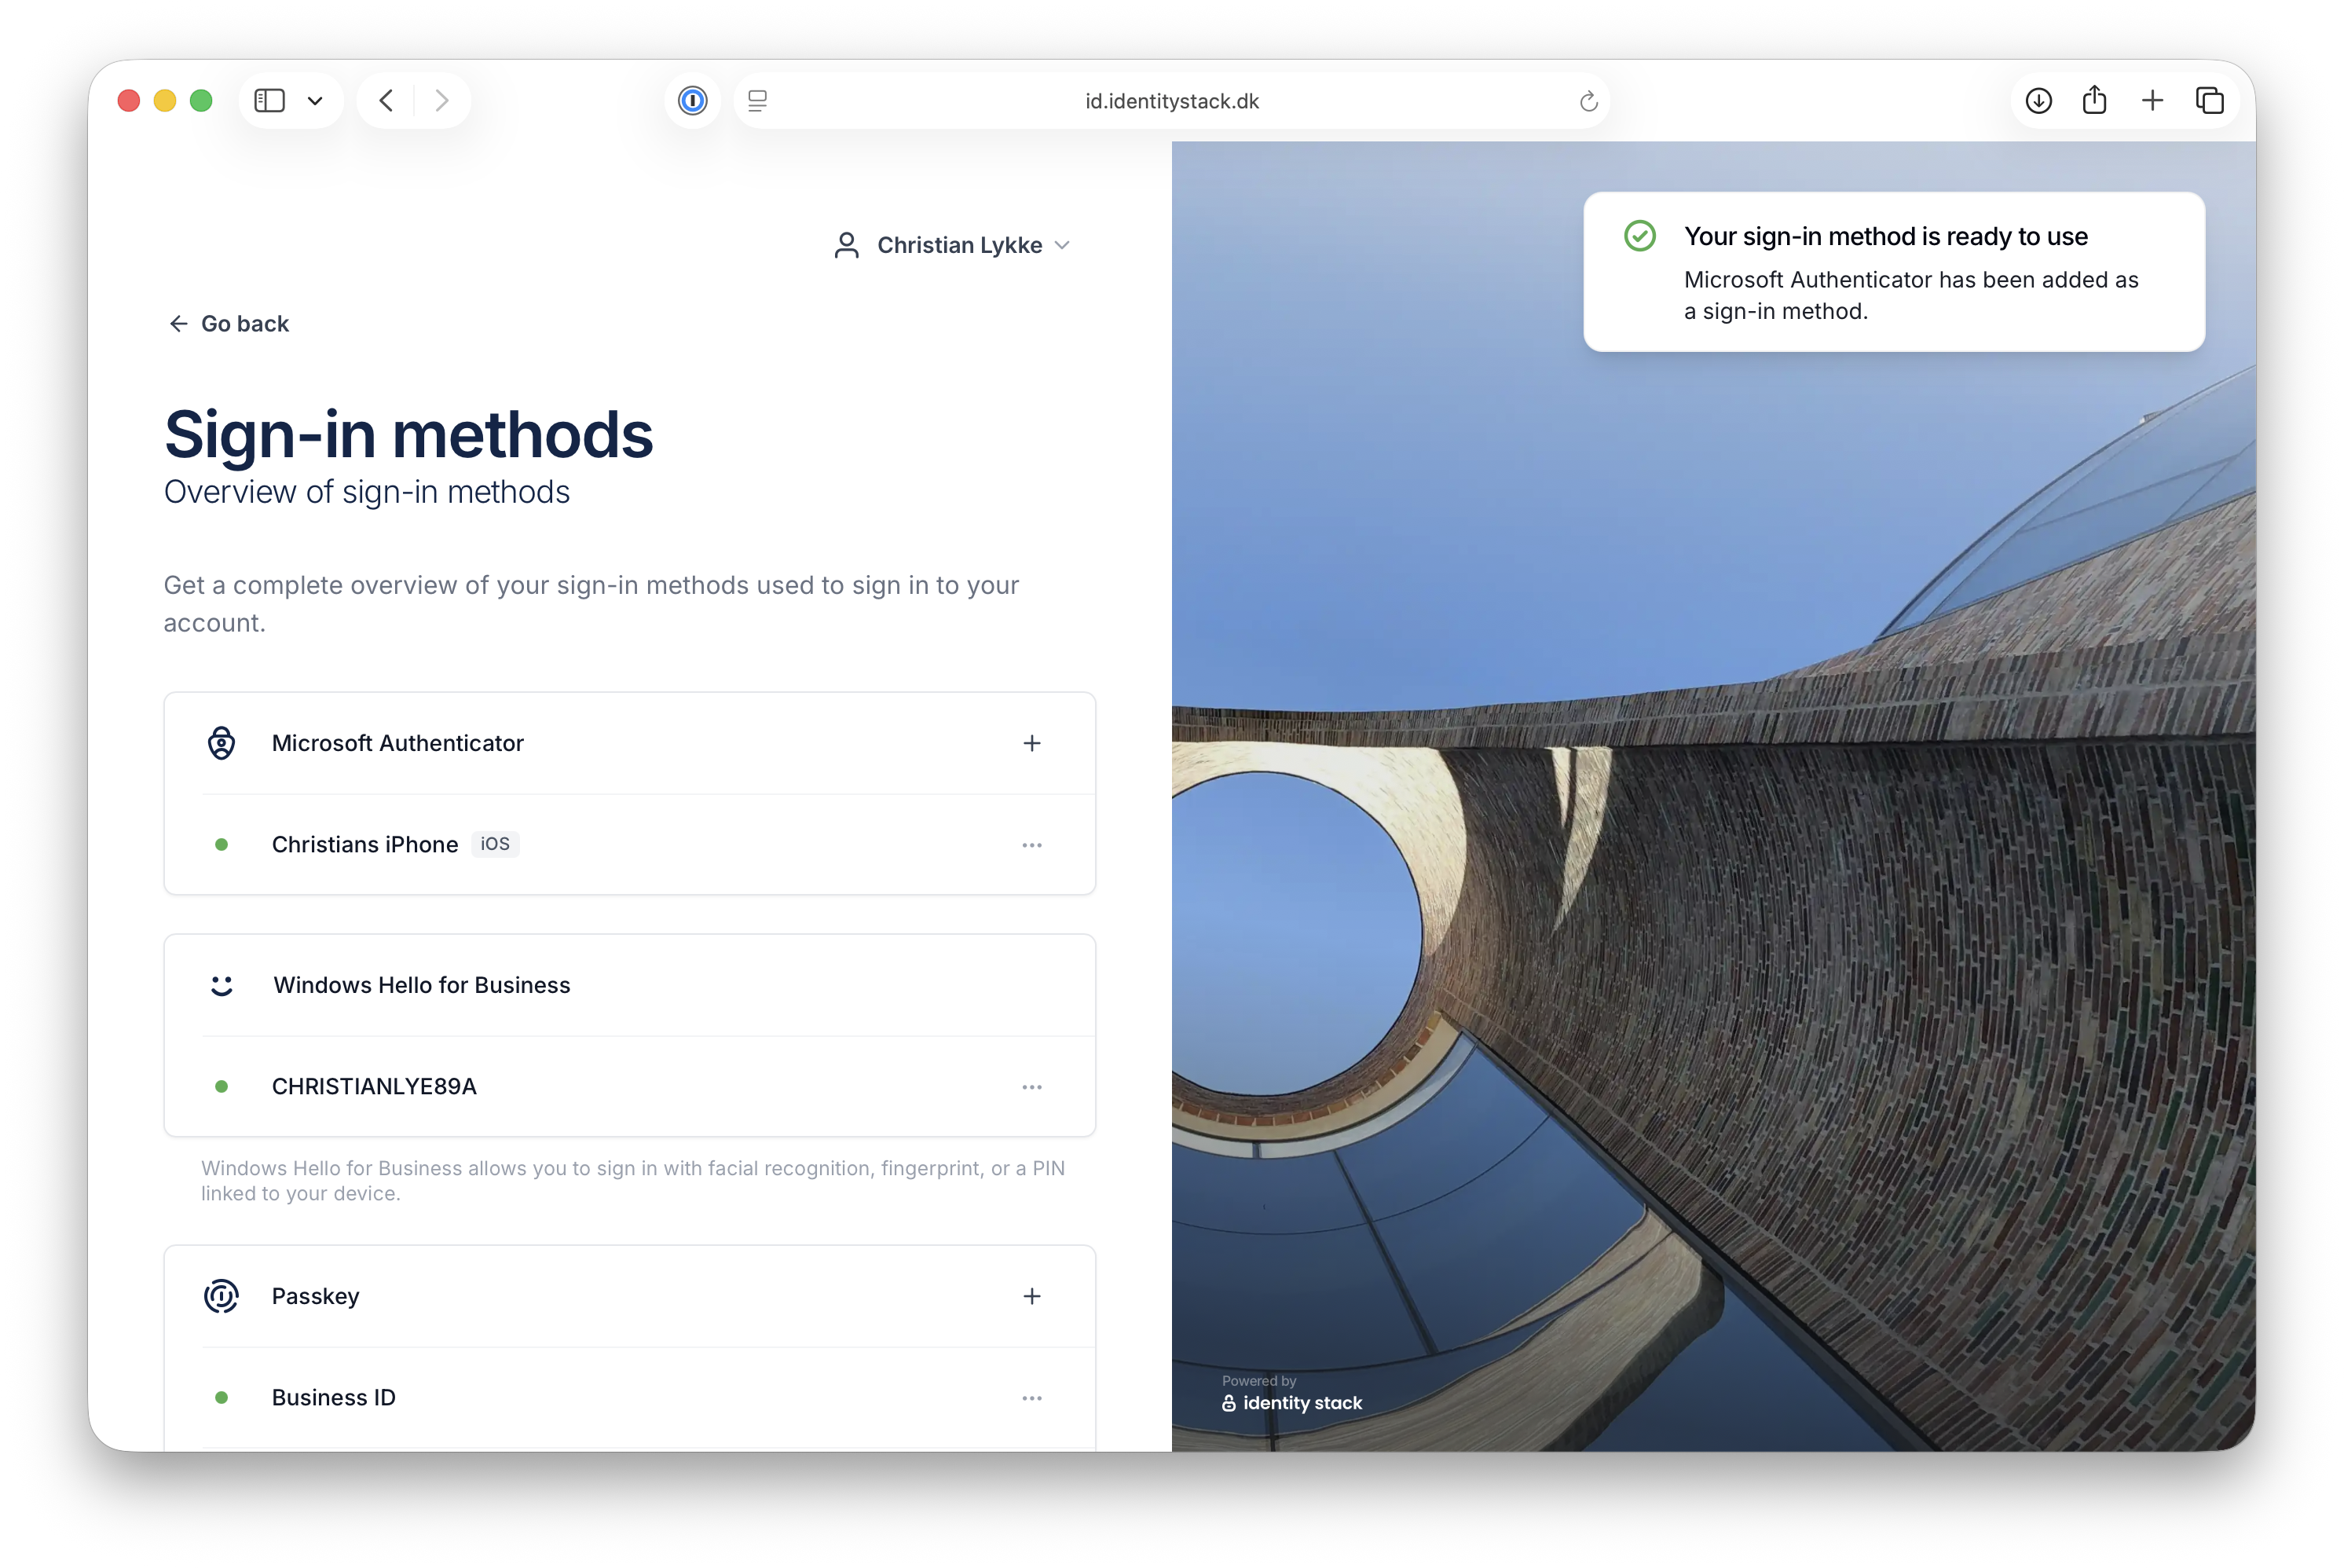
10. Your sign-in method is ready
Microsoft Authenticator has been added as a sign-in method, and the device is shown as active under Sign-in methods.